Looking to power your cabin or tiny home off-grid with a simple solar system that’s reliable and sized just right for your needs?

How To Size A Simple Off‑Grid Solar System For A Cabin Or Tiny Home
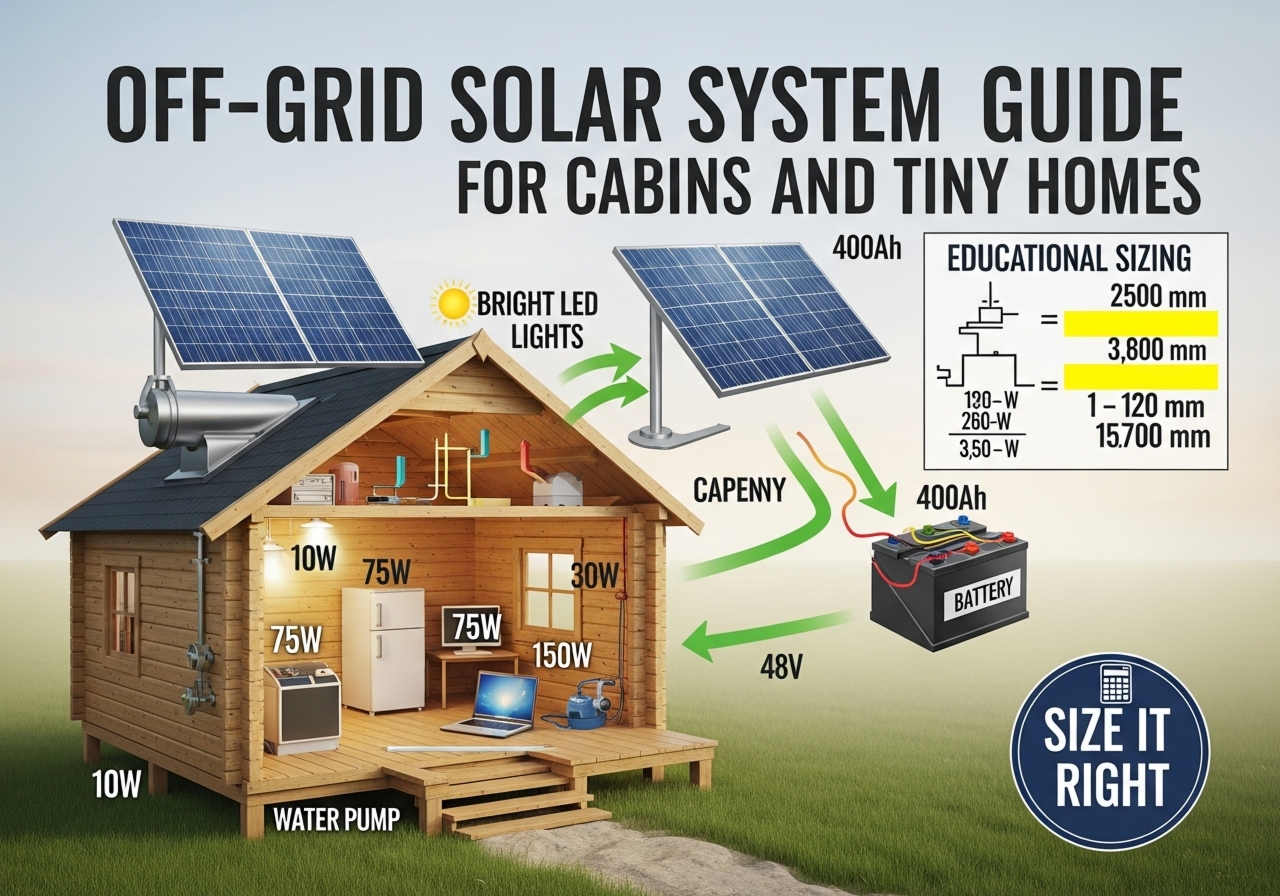
This guide walks you through each step of sizing a straightforward off‑grid solar system so you can plan confidently. You’ll learn how to estimate energy use, size panels and batteries, choose components, and make practical decisions that balance cost, simplicity, and reliability.
Why sizing matters and what “simple” means
You need the right balance between solar panels, batteries, inverters, and charge controllers for a system that works without constant tinkering. “Simple” means using proven components, minimizing complexity (few circuits, basic automation), and designing for what you actually use rather than a theoretical maximum.
Overview of the process
Sizing a system follows a predictable set of steps: estimate your energy needs, decide a system voltage, size the battery bank, size the solar array, choose the inverter and charge controller, and factor in losses and margins. Each step is manageable when you break it down.
Step 1 — Perform an energy audit (load analysis)
You’ll start by listing every appliance, its power rating (watts), and how long you’ll use it per day. This turns into the baseline daily energy demand in watt-hours (Wh). Accurate numbers here prevent oversizing or undersizing.
How to list appliances and usage
Write down each device: lights, fridge, pump, electronics, heater, etc. Next to each, note its wattage and estimated hours per day. If you don’t have a wattage, check the label, manual, or use a plug-in energy meter.
Example appliance list and calculation
Below is a sample table you can adapt. Replace the examples with your actual devices.
| Appliance | Wattage (W) | Hours per day | Daily Energy (Wh) |
|---|---|---|---|
| LED lighting (5 bulbs @ 7W) | 35 | 5 | 175 |
| Refrigerator (12V energy efficient) | 60 (average) | 8 | 480 |
| Water pump (12V DC) | 100 | 0.5 | 50 |
| Laptop | 60 | 4 | 240 |
| Phone charging (x2) | 10 | 4 | 40 |
| Microwave (occasional) | 800 | 0.1 | 80 |
| Space heater (not recommended) | 1500 | 0.5 | 750 |
| Miscellaneous | 50 | 2 | 100 |
| Total daily energy | 1,915 Wh |
Tips for accurate estimates
You’ll get better results if you estimate average rather than peak. For devices that cycle (like refrigerators), use the average wattage over a day. If unsure, multiply nameplate wattage by the estimated duty cycle (e.g., 30% for a fridge).
Step 2 — Convert to battery capacity (amp‑hours)
Once you have daily watt-hours, convert that to amp-hours (Ah) for the battery bank at your chosen system voltage (12V, 24V, or 48V). Batteries are rated in Ah, so this step is crucial.
Conversion formula
Use this formula:
- Amp-hours needed per day = Daily Wh / System Voltage
Example for a 12V system:
- 1,915 Wh / 12 V = 159.6 Ah per day
You’ll then adjust for depth of discharge (DoD) and days of autonomy.
Depth of discharge and days of autonomy
Batteries shouldn’t be fully drained. For lead-acid, use 50% DoD; for lithium (LiFePO4), you can use 80–90% DoD. Also decide how many cloudy days you want without sun (autonomy). Two to three days is common for cabins; one day might be fine for occasional use.
Example with 2 days autonomy and 50% DoD:
- Required Ah = Daily Ah × Days of autonomy / DoD
- Required Ah = 159.6 × 2 / 0.5 = 638.4 Ah at 12V
Table for quick reference
| System Voltage | Daily Wh | Daily Ah | Days Autonomy | DoD | Required Battery Ah |
|---|---|---|---|---|---|
| 12V | 1,915 Wh | 159.6 Ah | 2 | 50% | 638 Ah |
| 24V | 1,915 Wh | 79.8 Ah | 2 | 50% | 319 Ah |
| 48V | 1,915 Wh | 39.9 Ah | 2 | 50% | 160 Ah |
Step 3 — Choose battery type and configuration
Select between lead-acid (flooded, AGM, gel) and lithium (LiFePO4). Each has pros and cons in cost, lifecycle, efficiency, weight, and maintenance.
Lead‑acid vs lithium: quick comparison
- Lead-acid: lower up‑front cost, shorter cycle life, heavier, less usable capacity (50% DoD), require maintenance if flooded. Efficiency ~80–85%.
- Lithium (LiFePO4): higher up‑front cost, longer life (2,000–5,000 cycles), more usable capacity (80–90% DoD), lighter, maintenance-free, efficiency ~95%.
Choose what fits your budget and how often you will be at the cabin. If you want low maintenance and plan to use the system frequently, lithium is often worth the premium.
Battery bank wiring and series/parallel
You’ll wire batteries in series to increase voltage and parallel to increase capacity. For example, for a 24V system using 12V batteries, you wire two 12V batteries in series to make 24V, then parallel strings for more capacity.
Example battery bank choices
If you need 638 Ah at 12V (from earlier example):
- Option A (Lead-acid, 12V 200Ah batteries): Use 4 × 12V 200Ah in parallel = 800Ah nominal → usable 400Ah at 50% DoD (not enough). Use 8 × 200Ah = 1,600Ah nominal → usable 800Ah → meets need.
- Option B (LiFePO4, 12V 200Ah): Use 4 × 200Ah in parallel = 800Ah nominal → usable ~640Ah at 80% DoD → meets need.
Step 4 — Size the solar array (panels)
Solar panel sizing must replenish daily energy and top off the battery for autonomy while accounting for location solar resource and system losses.
Peak Sun Hours (PSH) and derating
Find the average daily peak sun hours for your location (PSH). Multiply PSH by panel wattage to get daily energy from each panel. Then account for system losses (wiring, charge controller, battery inefficiency). Use a derating factor of 0.7–0.8 as a practical rule.
Example: If your location has 4 PSH and you use derating 0.75:
- Effective daily energy per 100W panel = 100 W × 4 h × 0.75 = 300 Wh
Solar array sizing formula
Required array power (W) = Daily Wh / (PSH × system derate)
Using earlier daily requirement 1,915 Wh and 4 PSH with 0.75 derate:
- Array power = 1,915 / (4 × 0.75) = 1,915 / 3 = 638.3 W
Round up to a practical set of panels (e.g., three 250W panels = 750W).
Table for different PSH scenarios
| PSH (h/day) | Derate | Array Size (W) for 1,915 Wh/day |
|---|---|---|
| 3 | 0.75 | 852 W |
| 4 | 0.75 | 638 W |
| 5 | 0.75 | 511 W |
Panel orientation and seasonal notes
You’ll mount panels facing true south (Northern Hemisphere) or north (Southern) at an angle roughly equal to latitude for year-round performance, or adjust seasonally for winter. Winter months have less sun, so if you plan heavy use in winter, size the array larger or rely on a backup generator.
Step 5 — Choose a charge controller
The charge controller regulates power from panels to battery; MPPT controllers are more efficient, especially for higher-voltage panels feeding lower-voltage batteries.
PWM vs MPPT
- PWM: cheaper, best when panel voltage equals battery voltage, less efficient in many setups.
- MPPT: more expensive, can harvest 10–30% more energy, allows higher panel voltage than battery voltage, recommended for most off‑grid systems.
Sizing the charge controller
Choose a controller that can handle the array current and voltage. For MPPT:
- Max panel Voc must be below controller input limit.
- Controller current rating (A) = Total panel wattage / Battery voltage × safety margin (1.25).
Example: 750W array with 24V battery:
- Current = 750 W / 24 V = 31.25 A
- Controller needed ~ 31.25 × 1.25 = 39 A → use a 40A or 50A MPPT
Step 6 — Inverter selection
Inverters convert DC battery power to AC for standard appliances. Choose based on continuous power and surge rating.
Continuous vs surge power
- Continuous rating: power you can run indefinitely (e.g., fridge, lights).
- Surge rating: short-term peak (starting motors, power tools). Choose an inverter with surge capacity at least twice the continuous rating for motor loads.
Pure sine wave vs modified sine
Use pure sine wave inverters for sensitive electronics and most household appliances. Modified sine works for simple resistive loads but can cause issues with motors, microwaves, and charging devices.
Inverter sizing example
List the largest simultaneous loads. If you run a 60W fridge, 800W microwave (occasional), and 60W laptop, but you won’t run microwave and fridge start at same time, choose an inverter with:
- Continuous 1500 W and surge 3000 W for comfortable margin.
Inverter efficiency and battery drain
Inverter efficiency typically 85–95%. Factor inefficiency into battery calculations: divide AC load by inverter efficiency to get DC draw.
Step 7 — Wiring, fuses, and safety
Correct wire sizing and protection is essential for safety and efficiency. Undersized wire causes voltage drop and heat.
Wire sizing basics
Use wire gauge charts or voltage drop calculators. For DC systems, keep voltage drop under 3% for main runs. Shorter runs allow smaller wire; long runs require larger gauge.
Fuses and disconnects
Install fuses or breakers close to the battery on positive leads for inverter, charge controller, and panel strings where applicable. Use a battery disconnect switch so you can safely service the system.
Ventilation and battery placement
Place batteries in a ventilated area if using flooded lead-acid. Lithium batteries require less ventilation but still need temperature-controlled environments for optimal life.

Step 8 — Example full calculation
Let’s walk through a full example for clarity.
Scenario: You have a cabin, daily load 2,500 Wh, location PSH 4, choose 24V system, 2 days autonomy, lithium batteries (80% usable).
- Daily Wh: 2,500 Wh
- Daily Ah at 24V: 2,500 / 24 = 104.2 Ah
- Battery capacity with 2 days autonomy: 104.2 × 2 = 208.4 Ah
- Adjust for DoD 80%: 208.4 / 0.8 = 260.5 Ah → choose 24V 300Ah battery bank for margin
- Solar array sizing: Array W = 2,500 / (4 × 0.75) = 833 W → choose 900–1,000 W (e.g., four 300W panels)
- Charge controller: 1,000 W / 24 V = 41.7 A → ×1.25 = 52 A → choose a 60A MPPT
- Inverter: List simultaneous AC loads. Choose a 2,000 W pure sine inverter with 4,000 W surge.
This gives you a practical, conservative system suited to moderate cabin use.
Optimizing your system and reducing load
Reducing your load reduces battery and panel size significantly. Small changes have big impacts.
Common ways to reduce consumption
- Replace incandescent/halogen with LEDs.
- Use efficient DC appliances (12V fridge/pumps) where possible.
- Limit space heating with insulation and propane or wood stove.
- Use propane for water heating, cooking, and freeze protection.
Energy-efficient appliance tips
Look for Energy Star or DC-specific models. For refrigerators, consider chest-style and insulated models designed for off-grid.
Backup options: generator and hybrid setups
A generator provides backup charging during long cloudy periods, allowing smaller battery banks and arrays.
When to add a generator
If you expect long winter stays, high heating loads, or want to minimize cost by reducing battery capacity, include a small generator and an automatic transfer switch or manual connection.
Solar + generator approach
Use solar as primary with a generator for emergencies or extended low-sun periods. A battery-based inverter/charger can integrate both sources and manage charging.
Seasonal and site considerations
Sunlight and temperatures change with seasons and site shading. Account for worst-case months if you’ll rely heavily during that time.
Shading and array placement
Even partial shade on one panel can reduce array output significantly. Place panels where they receive direct sun most of the day and avoid tree shadows.
Temperature effects
Cold increases panel efficiency slightly but batteries perform worse in extreme cold. Insulate battery enclosures and use battery heaters if you live in very cold climates.
Cost considerations and budgeting
Costs vary widely by region, component quality, and battery chemistry. Below are rough ballpark costs to help plan.
Ballpark component costs (approximate)
| Component | Typical cost range |
|---|---|
| Solar panels (per W) | $0.40–$1.00/W |
| MPPT charge controller | $200–$1,000 (depends on size) |
| Inverter (1,500–3,000W pure sine) | $300–$1,200 |
| Lead-acid battery bank | $200–$1,200 per 100Ah (12V) |
| LiFePO4 battery | $600–$1,200 per 100Ah (12V) |
| Mounting hardware | $100–$500 |
| Wiring, fuses, disconnects | $100–$400 |
| Installation (if professional) | $500–$2,000+ |
Prices fluctuate; source multiple quotes. You’ll often trade up-front cost for longevity and lower maintenance.
Maintenance and monitoring
Regular maintenance keeps the system healthy and prevents surprises.
Routine checks
- Inspect panel mounting, clean panels if dirty.
- Check battery terminals and specific gravity if flooded.
- Monitor voltages and charge cycles.
- Check inverter and controller logs if available.
Monitoring options
Use simple voltage meters or full monitoring systems with remote apps for larger investments. Monitoring helps you spot failing panels, batteries, or usage spikes.
Safety and codes
Follow electrical codes and manufacturer instructions. If you’re not comfortable with DC wiring, hire a professional.
Permits and local rules
Some areas require permits for solar installation, even off-grid. Check local regulations for battery storage and electrical wiring.
Personal safety
Work with insulated tools, wear eye protection, and always disconnect batteries before major work. Treat battery terminals as live circuits.
Shopping checklist
Use this checklist before buying components to ensure compatibility and avoid surprises.
- Complete appliance list and daily Wh estimate
- Chosen system voltage (12V/24V/48V)
- Battery chemistry and Ah target
- Panel wattage total and layout plan
- MPPT controller size and voltage compatibility
- Inverter continuous and surge ratings (pure sine)
- Cables, fuse sizes, disconnects planned
- Mounting structure and tilt/azimuth plan
- Monitoring equipment and generator backup if needed
Example small system designs (quick reference)
Minimal weekend cabin (basic lighting, phone, small fridge)
- Daily Wh: ~800 Wh
- System voltage: 12V
- Battery: 12V 200Ah LiFePO4 (usable ~160Ah)
- Solar: 300–400W panels
- Controller: 30–40A MPPT
- Inverter: 1000W pure sine
Year-round tiny home (moderate loads, appliances)
- Daily Wh: ~4,000 Wh
- System voltage: 24V or 48V recommended
- Battery: 24V 400–600Ah LiFePO4 or equivalent
- Solar: 1.5–2.5 kW array (depending on location)
- Controller: 100A+ MPPT (or multiple units)
- Inverter: 3,000–6,000W pure sine
Frequently asked questions
How do I choose system voltage?
Higher voltages (24V, 48V) reduce current, allowing smaller wire and more efficient transfer for larger systems. For small systems under ~1,000W, 12V is simple; for larger systems, use 24V or 48V.
Can I mix panel wattages or brands?
You can, but mismatched panels in series reduce the string to the weakest panel. Group similarly rated panels or use multiple strings to avoid performance loss. MPPT controllers help, but matching is still best.
How long will the batteries last?
Depends on chemistry, cycles, and depth of discharge. Lead-acid might last 3–7 years; LiFePO4 10–15 years with proper management.
Is it worth going off-grid with solar?
If you value independence, have reliable design and realistic expectations, off‑grid solar can be a great solution for cabins and tiny homes. Consider your usage, local climate, and budget.
Final thoughts and practical advice
You’ll be happiest with a system tailored to your real usage and seasonal needs, with a bit of margin for cloudy days and inefficiencies. Start with a careful energy audit, prefer efficient appliances, choose components that match your skill level, and plan for safety and maintenance.
If you want, you can share your appliance list and location (PSH estimate), and I’ll help you run the numbers for a recommended system layout and parts list.