Would you like to grow a reliable, productive off‑grid garden in a very small space even if your soil looks hopeless?
Introduction
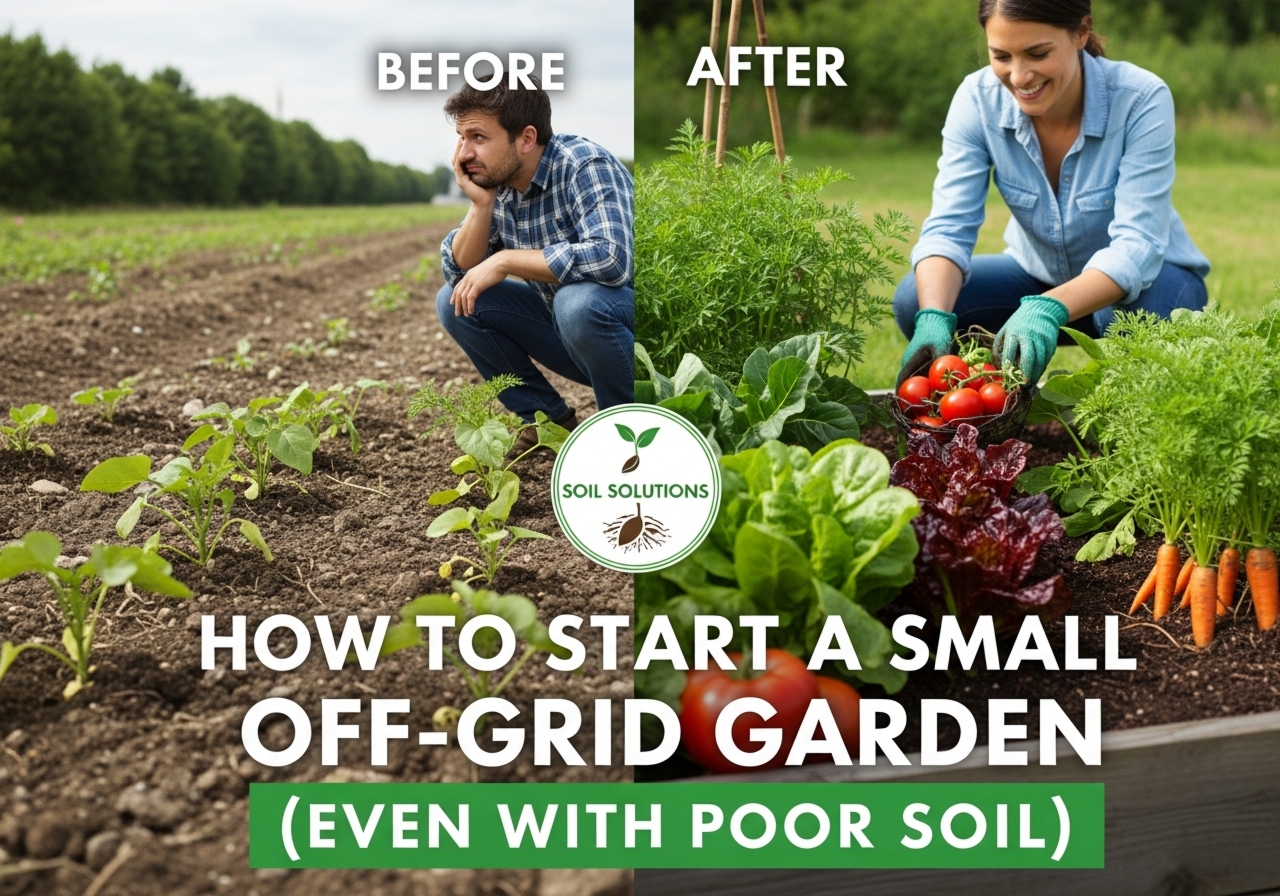
You can create a bountiful, low‑input garden in a tiny area without relying on mains water or perfect soil. This guide walks you through planning, building, and maintaining an off‑grid garden that thrives in raised beds, containers, vertical systems, and creative micro‑gardens. Every section gives practical steps you can use right away.
Start with clear goals
Decide what you want from the garden before you dig. Are you growing fresh salad greens and herbs, preserving food for winter, reducing grocery bills, or building long‑term soil health?
Write down what you want to harvest, how much time you can spend per week, and any constraints (shade, water restrictions, neighbors). That clarity guides the rest of your choices and helps you pick crops and systems that match your lifestyle.
Survey your site and microclimates
Take a careful look at the space you have. Note sun exposure, wind patterns, shade sources, and how water drains. Small changes can create useful microclimates.
- Track sunlight at different times of day for several days to identify the sunniest spots.
- Notice where cold air pools and where walls or fences reflect heat.
- Identify roof runoff points for rainwater capture.
Understanding these details helps you place beds, choose crops, and design water capture and protection measures.
Choose the right small‑space growing systems
Small gardens work best with systems adapted to limited soil volume and water. Pick one or combine several.
Systems and when to use them
Below is a quick comparison to help you choose.
| System | Best for | Pros | Cons |
|---|---|---|---|
| Raised beds (standard) | Poor native soil, good sun | Easy to control soil quality, accessible | Requires initial soil build |
| Containers (pots, grow bags) | Extremely small spaces, balconies | Mobile, cheap, low soil needs | Frequent watering, limited root volume |
| Self‑watering containers / wick beds | Water‑scarce situations | High water efficiency, low maintenance | Slightly more complex to build |
| Vertical gardening (trellises, towers) | Very small footprints | Multiplies production per area | Requires structure, some crops only |
| Hügelkultur / lasagna beds | Reusing woody debris, building fertility | Great for retaining moisture and building soil | Bulky to build initially |
| Hydroponic/aeroponic (passive) | Very limited soil, high control | Fast growth, high yields in small spaces | Often needs power; not truly passive off‑grid |
Choose systems that match your water access, physical ability, and budget. For off‑grid setups, prioritize low‑energy, water‑efficient structures like raised beds, wick beds, and vertical containers.
Fixing poor soil: quick wins and long‑term strategies
Even with terrible soil you can achieve productive beds. Combine immediate solutions that let you grow this season with practices that rebuild soil over years.
Test and observe
Start with a simple soil test: texture (sand, silt, clay), pH, and a basic nutrient test kit or send a sample to a lab if possible. You don’t need perfect numbers to start — tests help prioritize amendments.
Instant approaches to growing now
- Use raised beds or containers and fill them with a good growing mix. A basic mix: 40% compost, 40% screened topsoil or loam, 20% aeration material (coconut coir, perlite, or coarse sand).
- Lasagna (sheet) mulching: lay cardboard, then layers of carbon (dry leaves, straw) and nitrogen (green waste, kitchen scraps) topped with compost. This builds a usable bed in weeks to months.
- Hügelkultur: bury logs and branches under compost and topsoil. The decomposing wood holds moisture and slowly releases nutrients, great for water conservation and long‑term fertility.
Long‑term soil building
- Add compost each season — aim to top‑dress 1–2 inches annually.
- Grow cover crops / green manures (clovers, rye, vetch) in off‑seasons to add organic matter and capture nutrients.
- Introduce worm composting to create vermicompost for concentrated fertility.
- Use rock dust or mineral amendments if tests show deficiencies.
- Add biochar mixed with compost to improve cation exchange capacity and microbial habitat.
Composting and fertility cycles
Composting recycles leaves, kitchen scraps, and yard waste into soil gold. Use a combination of hot composting (for fast breakdown and weed/mud seed kill) and vermicomposting (for nutrient‑dense castings).
- Hot compost recipe: 2 parts brown (carbon) to 1 part green (nitrogen); layer and turn every 1–2 weeks; reach 55–65°C to kill weed seeds.
- Worm bin: keep worms in a shaded bin with shredded cardboard, vegetable scraps, and moist bedding; harvest castings every few months.
- Compost tea: steep compost in non‑chlorinated water with aeration for 24–48 hours to make a microbial inoculant.
Water strategies for off‑grid gardens
Water is the limiting factor for most off‑grid gardens. Plan carefully to stretch every drop.
Rainwater harvesting
Capture roof runoff into barrels or tanks. For small spaces, stackable barrels or slimline tanks fit well. A 1000‑liter tank stores a lot for a microgarden.
- Position barrels under downspouts with a screened inlet to keep debris and mosquitoes out.
- Use gravity or a small solar pump to distribute water. Gravity setups are reliable and require no electricity.
Check local regulations about rainwater collection before installing.
Graywater and reuse
If allowed, you can reuse graywater (bath or laundry water without harsh chemicals) to irrigate non‑edible ornamentals or root crops with caution. Use safe detergents and follow local rules.
Irrigation techniques
- Mulch heavily (2–4 inches) to reduce evaporation.
- Use drip irrigation or soaker hoses on timers to deliver water directly to roots.
- Self‑watering containers and wick beds autonomously draw water up to plants and reduce surface evaporation.
- Water deeply but infrequently to encourage deeper roots.
Water budgeting and scheduling
Estimate water needs: a mature bed might use 0.5–1 inch of water per week in growing season per square foot. Start with morning watering and adjust to weather.
")
Crop selection for small spaces
Pick crops that give high yield per square foot, fit your climate, and match available sunlight and water.
Best crops for tiny off‑grid gardens
Use compact, fast‑producing, or vertical crops.
| Crop | Space needs | Time to harvest | Notes |
|---|---|---|---|
| Leaf lettuce & salad greens | 4–9 plants/sq ft | 30–45 days | Cut‑and‑come‑again gives continuous harvest |
| Radishes | 9–16 plants/sq ft | 25–35 days | Very fast, good filler between transplants |
| Bush beans | 4–9 per sq ft | 50–60 days | Protein and nitrogen fixers |
| Pole beans | Vertical | 60–70 days | Use trellis to save space |
| Cherry tomatoes (dwarf) | 1 plant/2–4 sq ft | 60–80 days | Use indeterminate/dwarf varieties |
| Kale / Swiss chard | 1–4 per sq ft | 40–60 days | Harvest outer leaves |
| Herbs (basil, thyme, parsley) | 4–16 per sq ft | 30–80 days | High value and low space |
| Potatoes (in containers) | 1 per 2–3 gallons | 90 days | Grow in bags or towers |
| Strawberries | 4–6 per sq ft | 60–90 days | Use vertical planters for more yield |
| Garlic / shallots | 6–9 per sq ft | 180–240 days | Plant in fall for next summer harvest |
Choose varieties labeled “compact,” “container,” or “dwarf” when space is tight.
Layout and intensive planting strategies
Use techniques that maximize productivity per square foot.
Square foot gardening
Divide beds into 1‑ft squares and plant intensively according to crop spacing. This reduces wasted space and simplifies planning.
Succession planting
Stagger plantings every 1–3 weeks for continuous harvests. Pull early crops (radishes, lettuce) and immediately replant spilled spaces with mid‑season crops or cover crops.
Intercropping and companions
Plant quick maturing crops among slower ones (e.g., lettuce between tomato rows). Use companion plants that deter pests or boost growth.
| Companion pairing | Benefit |
|---|---|
| Tomatoes + basil | Improved flavor and pest repellent |
| Corn + beans + squash (three sisters) | Beans fix nitrogen, corn supports beans, squash shades soil |
| Carrots + onions | Onion scent repels carrot flies |
Pest and disease management without chemicals
In small gardens you can often handle pests by prevention, physical control, and encouraging beneficials.
Prevention and cultural controls
- Start with healthy seedlings and clean seed trays.
- Rotate crops year to year to break pest cycles.
- Keep beds weeded and tidy; remove diseased leaves promptly.
- Use row covers to protect seedlings from insects.
Encouraging beneficials
- Plant flowers (calendula, alyssum, dill) to attract predatory insects and pollinators.
- Provide small habitat like a shallow water dish, logs, or a bug hotel.
Physical and organic controls
- Hand‑pick larger pests (slugs, caterpillars).
- Use diatomaceous earth for slugs and crawling insects (apply sparingly).
- Make soap sprays (mild insecticidal soap) for aphids and soft‑bodied pests.
- Use floating row covers and sticky traps when needed.
Season extension and microclimate tricks
Get more harvest weeks by protecting plants from frost and extending warmth.
Cold frames and cloches
Small DIY cold frames or plastic cloches protect seedlings and allow earlier planting. Use recycled windows or polycarbonate for frame tops.
Low tunnels and hoop houses
Build low tunnels with PVC or wire hoops and plastic sheeting to warm soil and air. Open on warm days to prevent overheating.
Heat-retaining structures
Place dark stones or water barrels near beds to absorb heat by day and release it at night.
Energy and off‑grid equipment
Off‑grid gardens should minimize electricity use, but a little renewable energy can improve productivity.
- Solar panels powering a pump for rainwater tanks add convenience. Small panels (50–200 W) with a 12V pump and battery bank can run drip systems intermittently.
- Manual tools (broadfork, hand trowel, hori hori) are reliable and low maintenance.
- Invest in a good pair of pruners, a digging fork, and a watering wand.
Think low‑tech first, then add solar or battery solutions only as needed.
Building a simple off‑grid irrigation system
Plan a gravity or solar pump system based on water tank placement.
- Put your main storage uphill from beds if possible. Gravity flow can feed drip lines with a simple pressure regulator.
- For flat sites, a 12V solar pump with a float switch can move water from tank to raised bed reservoirs.
- Install a basic drip kit: mainline, emitters, and a timer or simple valve. Use pressure compensating drip emitters for even distribution.
Regularly check filters and winterize tanks if you live in freezing climates.
")
Seed selection, saving, and starting
Seeds are the most off‑grid, high‑value resource you can have.
- Start with open‑pollinated and heirloom varieties for easy seed saving.
- Use a seed‑starting mix and a warm, bright spot to germinate seeds indoors. A simple heating mat powered by a small solar setup can help but is not required; many crops do fine starting outdoors or in sunlit windows.
- Learn simple seed‑saving methods (lettuce: let bolt, collect dry seed; beans: let pods dry and thresh) for long‑term resilience.
Harvesting, preserving, and reducing waste
Harvest regularly and preserve surplus so nothing goes to waste.
- Preserve by fermenting (sauerkraut, kimchi), drying (herbs, tomatoes), canning (pressure or water bath), freezing, and rootcellaring (potatoes, carrots, apples).
- Dry herbs in bundles, dehydrate tomatoes and store in oil, freeze blanched vegetables in small packs.
- Learn dehydration and fermentation basics before a big harvest to avoid spoilage.
Maintenance schedule and record keeping
Set a simple routine and track what works.
- Weekly: check water, weed, harvest, check for pests.
- Monthly: top‑dress compost, inspect trellises, prune as needed.
- Seasonal: rotate crops, plant cover crops, overhaul beds.
Keep a notebook or spreadsheet of planting dates, varieties, watering events, and yields. You’ll learn quickly what to change next year.
Troubleshooting common problems
Here are quick fixes for typical issues.
- Low germination: check seed age, planting depth, and soil temperature.
- Yellow leaves: likely nutrient deficiency or overwatering — check drainage and add compost or balanced fertilizer.
- Slow growth: check soil compaction, root crowding, or low light.
- Pests: identify the pest, remove manually if small problem, use row covers or organic sprays if severe.
When in doubt, take a photo and ask local gardeners or online community groups for identification and specific advice.
Budgeting and phased build plan
You can start very small and scale up. Here’s a simple three‑phase plan.
1 — Starter (low cost)
- 2–4 containers or one 4×4 raised bed, basic soil mix, seeds.
- Rain barrels or a single 55‑gal drum.
- Estimated cost: $50–$200.
2 — Growing (moderate)
- Two raised beds (4×8), compost bin, trellis, basic drip kit, more soil.
- Vermicompost bin and more seeds/seedlings.
- Estimated cost: $200–$800.
3 — Resilience (investment)
- Larger water tank, solar pump, additional beds, perennial plantings (berries), more tools.
- Estimated cost: $800–$3000 depending on capacity.
Buy second‑hand items where you can and prioritize soil and water systems first.
Legal and neighborhood considerations
Check local regulations for water harvesting, composting, and structures (fences, greenhouses). Communicate with neighbors if shading or fences could affect them. Many municipalities have specific rules about rainwater and graywater.
Safety and biosecurity
- Keep tools clean between beds to prevent disease spread.
- If you use animal manures, compost hot enough to kill pathogens before applying to vegetable beds.
- Use gloves when working with chemicals or rough materials and eye protection for power tools.
Final tips to maximize productivity
- Start small and expand as you succeed. Small, well‑managed beds outperform neglected larger spaces.
- Prioritize edible perennials and high‑value crops (herbs, salad greens, tomatoes).
- Invest in compost and water systems first; they pay back in reduced inputs and effort.
Quick reference planting calendar (temperate climates)
This is a generic guide — adjust for your frost dates and microclimate.
| Season | Tasks |
|---|---|
| Late winter / early spring | Start seeds indoors (tomatoes, peppers), prepare beds, top dress compost |
| Spring | Plant cool‑season crops (lettuce, radish, peas), transplant seedlings |
| Late spring / summer | Plant heat‑tolerant crops (beans, squash), mulch heavily |
| Late summer / fall | Succession plant salad greens, start fall brassicas, harvest and preserve |
| Fall / winter | Plant garlic, cover crops, clean and repair structures |
Encouragement and next steps
You don’t need perfect soil or a big yard to grow meaningful amounts of food. With thoughtful planning, compost, water capture, and the right crops, you can build a resilient, off‑grid garden in a small footprint. Start with one bed or a few containers, keep notes, and tweak the system as you learn. In a few seasons you’ll notice marked improvements in soil and yield.
If you want, tell me about your space (square footage, sun hours, climate) and I’ll suggest a specific layout, planting list, and phased materials list tailored to your situation.