Are you ready to design and build an off‑grid water system that gives you reliable, safe water where municipal services aren’t available?
DIY Off‑Grid Plumbing: How To Set Up A Reliable Water Flow System
This guide walks you through planning, components, installation, and maintenance so you can create a dependable off‑grid water supply. You’ll get practical instructions, comparisons, sizing tips, and troubleshooting advice to make smart decisions and avoid common pitfalls.
Why going off‑grid requires different plumbing thinking
Off‑grid plumbing isn’t just a scaled‑down version of municipal plumbing; it demands planning for storage, energy independence, and water quality. You’ll have to balance gravity, pumps, filtration, and redundancy so your water flows reliably under changing conditions.
Priorities: reliability, safety, and efficiency
Your primary goals should be to ensure safe drinking water, consistent flow for daily uses, and energy efficiency for pumps and heaters. Focusing on these priorities early will shape choices for source, storage, and treatment.
Assess what “reliable” means for you
Reliability can mean low maintenance for some people, or continuous pressurized supply for others. Decide whether you want simple gravity-fed taps, a pumped pressurized system, or a hybrid arrangement that uses solar or generator backup.
Planning your off‑grid water system
Good planning prevents expensive mistakes. You’ll need to assess your water source, estimate daily use, evaluate power availability, and choose a layout that fits the land and budget.
Evaluate water sources on-site
Identify possible sources: shallow well, deep well, spring, surface water (stream, pond), rainwater catchment, or hauled water. Each source requires specific treatment and pumping strategies, and some may have legal restrictions.
Estimate daily and peak demand
Calculate your household’s average daily water use and peak demands like simultaneous showering, laundry, and irrigation. Use conservative estimates: typical off‑grid households use 20–50 gallons per person per day depending on conservation. Peak flow influences pump sizing.
Check legal and environmental constraints
You’ll need to research local water rights, building codes, and setbacks, especially for wells and surface water intake. Protecting watersheds and avoiding contamination from septic systems is essential.
Choosing a water source and how it affects system design
The type of source determines your treatment level, storage needs, and pumping equipment. You’ll design differently for a gravity-fed spring than for a drilled well.
Wells (shallow vs. deep)
Shallow wells (less than 25 feet) may allow hand pumps or shallow well jet pumps, while deep wells require submersible pumps and considerations for well yield and drawdown. You’ll test for flow rate and water quality.
Springs and surface water
Springs often provide good gravity options but require spring boxes and sediment traps. Surface water needs robust intake screens, sediment settling, and advanced filtration to remove organic contaminants and pathogens.
Rainwater harvesting
Rain collection is excellent for off‑grid homes but demands large roof catchment, first‑flush diverters, mosquito-proof storage, and filtration for potable use. You’ll size storage to cover dry periods.
Storage: tanks, cisterns, and sizing
Storage buffers supply and demand and provides a reserve for pumps and treatment. Choosing the right size and material matters for safety and longevity.
Storage functions and types
Tanks store water for daily use and fire or drought reserves, offer sediment settling, and allow disinfection contact time. Common materials include polyethylene, fiberglass, concrete, and steel. Each has pros and cons in durability and maintenance.
How to size storage for your needs
Base sizing on daily use and desired days of autonomy. A simple formula: Storage (gallons) = Daily Use (gallons/day) × Days of Autonomy. For most off‑grid homes, 2–7 days of storage is a common target depending on source reliability.

Pumps: types, selection, and placement
Pumps move water from source to storage and then into the house. You’ll choose between manual, electric, solar, and engine-driven units, and between submersible and surface pumps.
Pump types and common applications
Pumps fall into categories like submersible (deep wells), jet pumps (shallow wells), centrifugal (surface water/boosting), diaphragm (low flow/high head), and solar-powered pumps. Each type suits specific head/flow needs.
Pump selection basics: flow rate and head
You select a pump based on required flow rate (gallons per minute, GPM) and total dynamic head (TDH) — the sum of vertical lift, friction losses, and pressure head. Accurate TDH calculation ensures the pump performs reliably.
Table: Typical pump selection factors
| Pump Type | Typical Use | Pros | Cons |
|---|---|---|---|
| Submersible | Deep wells | Efficient, quiet, self-priming | Harder to service, requires good well conditions |
| Shallow well jet | Wells <25 ft< />d> | Affordable, repairable | Not for deep wells |
| Centrifugal | Surface/boost | Good for high flows | Must remain primed |
| Diaphragm | Remote/low flow | Handles solids, low power | Lower flow rates |
| Solar pump | Off-grid with sun | Low operating cost, no grid | Dependent on sunlight, storage/controls needed |
Pump placement and protection
Place pumps where they’re accessible for maintenance and protected from freezing and flooding. For submersibles, ensure proper cable sealing and a secure check valve. For surface pumps, install a pump vault or insulated room.
Pressure systems: tanks, switches, and pressure tanks
A pressurized system gives you municipal-style taps. Using a pressure tank reduces pump cycling and prolongs pump life.
How pressure tanks work
Pressure tanks store water under compressed air so the pump doesn’t turn on every time you open a tap. You’ll set a cut-in/cut-out pressure on the pressure switch (commonly 30/50 psi).
Sizing a pressure tank
Tank sizing depends on pump settings and desired pump cycles. Smaller tanks lead to frequent cycling; larger tanks reduce cycles. Use manufacturer charts or simple rules of thumb: for a 30/50 system, at least 20–40 gallons of usable capacity is common for single-family homes.
Table: Typical pressure tank sizing guide
| System (Cut-In/Cut-Out) | Typical Tank Size (gallons) | Use Case |
|---|---|---|
| 20/40 | 20–30 | Small cabin, low flow |
| 30/50 | 40–80 | Average off‑grid household |
| 40/60 | 80–120 | High‑demand households |
Pressure regulation and safety
Include a pressure relief valve and backflow prevention on potable connections. Install gauges to monitor system pressures and a pressure switch with a manual override where possible.
Plumbing materials and layout
Choosing durable pipes and smart routing minimizes leaks and maintenance. You’ll consider cost, longevity, and ease of repair.
Common pipe materials and pros/cons
Pipes include PEX, copper, PVC, CPVC, and polyethylene (HDPE). PEX is flexible and freeze-resistant; copper is durable but costly; PVC is cheap for cold water; CPVC handles hot water better; HDPE is used for buried lines and well casings.
Table: Pipe material comparison
| Material | Typical Use | Strengths | Weaknesses |
|---|---|---|---|
| PEX | Indoor supply | Flexible, easy to install, freeze-flex | UV sensitive (keep covered) |
| Copper | Indoor/buried | Durable, heat tolerant | Expensive, requires soldering |
| PVC | Cold water | Cheap, rigid | Not for hot water, solvent-welded joins |
| CPVC | Hot water | Heat resistant | Brittle in cold, solvent-welded |
| HDPE | Buried/transfers | Very durable, flexible | Specialized fittings |
Layout tips for efficiency
Minimize runs and elevation changes to reduce pumping energy. Group fixtures to reduce branching and install a main shutoff and zone shutoffs for easier maintenance.
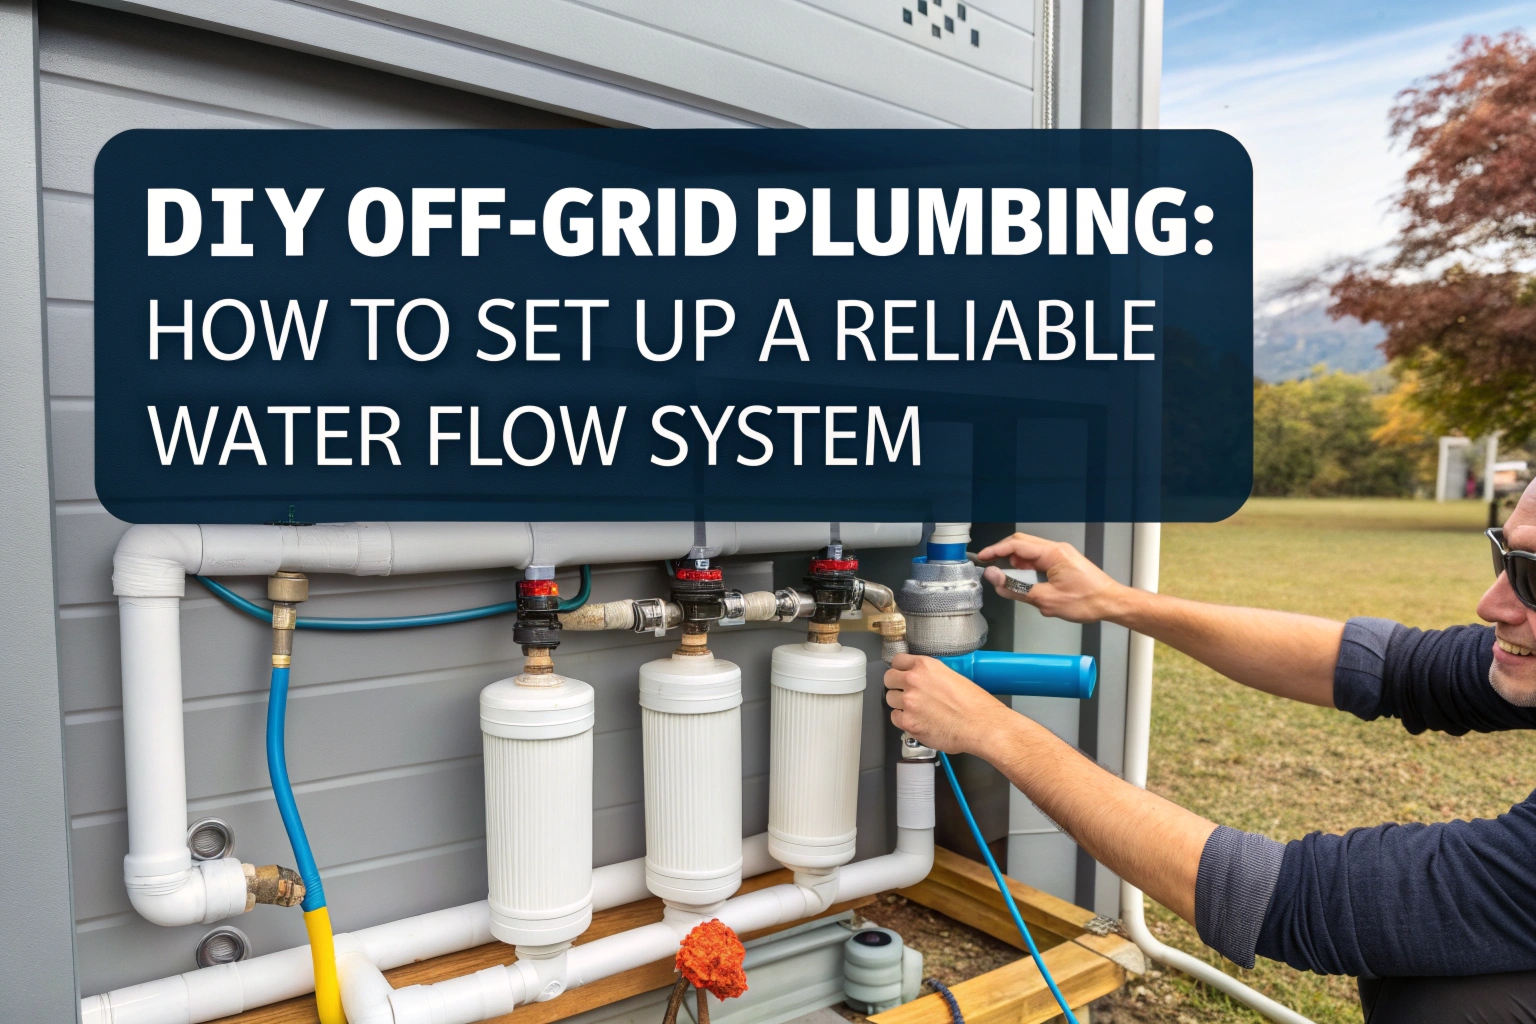
Filtration and water treatment
You’ll protect health with proper treatment tailored to your source. Multi-stage systems often give best results.
Basic filtration stages
Start with a sediment filter to remove particles, then activated carbon to remove taste and VOCs, and finally a disinfecting step (chlorination, UV, or ozonation) for pathogens. For heavy metal or specific contaminants, consider reverse osmosis or ion exchange.
Table: Typical filtration components and uses
| Stage | Purpose | Notes |
|---|---|---|
| Sediment filter (5–50 μm) | Remove sand, silt | Protects downstream equipment |
| Activated carbon | Remove taste/odor/chemicals | Replace cartridges regularly |
| UV disinfection | Inactivate bacteria/viruses | Requires clear water (low turbidity) |
| Chlorination | Residual disinfection | Provides ongoing protection in storage |
| Reverse osmosis | Remove dissolved solids | High waste water ratio, for drinking water only |
Matching treatment to source
If you use a spring or well with low turbidity, UV plus prefiltration often suffices. Surface water usually requires coagulation, settling, or sand filters before UV. Test water regularly to tailor treatment to contaminants present.
Heating water off‑grid
You’ll choose water heating methods based on energy availability: tankless propane, electric with solar PV, wood-fired boilers, or solar thermal collectors.
Efficient options and sizing
Solar thermal yields excellent efficiency for hot water if you have good sun and storage. Tankless propane gives on‑demand heat without storage losses. Size your tankless unit by peak hot water flow (e.g., showers + dishwasher).
Freeze protection for hot water lines
Insulate lines and route them inside heated spaces where possible. For exterior or exposed lines, use heat tape or bury below frost line. A recirculation loop with a timer helps prevent stagnation and freezing in long runs.

Freezing prevention strategies
Cold climates require planned freeze protection to avoid burst pipes and system failures. You’ll use insulation, burial depth, and heat sources.
Burial depth and insulation
Bury water lines below local frost line if possible, or inside insulated trenches. Use foam pipe insulation and weatherproof housings for outdoor components like pumps and valves.
Freeze-proofing devices
Install frost-free hydrants for outdoor taps and vacuum breakers with insulation. In pump rooms, keep a small thermostatically controlled heater or use heat-conserving enclosures to maintain above-freezing temperatures.
Controls, monitoring, and power management
You’ll manage pumps and treatment with controls for efficiency and protection. Monitoring helps you detect leaks and low-water conditions early.
Control components to include
Install float switches or pressure sensors to protect pumps from running dry, a timer or controller for solar pumps, and a manual transfer switch if using generator backup. Remote telemetry (cell or satellite) helps if you’re not on-site often.
Power options for pumps and treatment
Use grid power if available, or solar, wind, or generator. For solar systems, size PV array and battery bank to handle pump loads and consider MPPT controllers for efficiency. Low‑power pumps and DC options reduce battery needs.
Installation best practices and safety
Follow safe practices for excavation, working with pressure systems, and disinfection. You’ll also need basic plumbing skills and the right tools.
Safety and permitting
Obtain any required permits, mark underground utilities before digging, and adhere to electrical codes when wiring pumps and controls. Use personal protective equipment when handling chemicals for disinfection.
Disinfection and startup
Shock new systems with chlorine to disinfect piping and tanks, then flush until there’s no detectable chlorine odor or until test strips show safe levels. Retest source water to confirm treatment efficacy before using for drinking.
Maintenance schedule and checklist
Regular maintenance keeps the system reliable and extends component life. You’ll set a schedule for inspections and replace consumables before they fail.
Routine tasks and frequency
Inspect filters monthly, change sediment and carbon cartridges every 3–12 months depending on load, check tank pressure annually, inspect for leaks monthly, and test water quality quarterly. Clean tanks and spring boxes annually or as needed.
Table: Maintenance checklist
| Task | Frequency | Notes |
|---|---|---|
| Inspect for leaks | Monthly | Check joints, valves, fittings |
| Replace sediment filter | 3–6 months | More often with surface water |
| Replace carbon filter | 6–12 months | Depends on contaminant load |
| Test water quality | Quarterly | Bacteria, nitrates, metals |
| Pressure tank check | Annually | Verify precharge pressure |
| Clean storage tank | Annually | Remove sediment and disinfect |
Troubleshooting common problems
Knowing common failure modes helps you fix small issues before they become big problems. You’ll learn what to check and how to interpret symptoms.
No flow or low flow
Check power to the pump, verify pump priming (for surface pumps), test well drawdown and pump performance, and inspect for clogged filters or closed valves. If flow worsens suddenly, look for broken pipes or frozen sections.
Pump cycling rapidly
Rapid cycling usually indicates a small pressure tank, failed bladder, or improper pressure switch settings. Check tank precharge and replace a failed tank or adjust switch settings.
Contamination indicators
If water tastes or smells odd, check carbon filters, look for runoff or septic contamination near sources, and test for microorganisms. Re‑chlorinate storage and upstream components if bacteria are detected.
Example system designs
Seeing sample layouts helps you choose the right approach. Here are a few common designs with brief explanations.
Gravity-fed spring system with minimal pumping
A spring collects into a sealed spring box that feeds a downhill storage tank by gravity. You’ll use a low-power pump only for pressure boosting in the house. This design is low-energy and reliable if your spring has consistent flow.
Well with pressure tank and submersible pump
A submersible pump in the well fills a cistern or pressurizes a tank with a pressure switch for household use. This common setup mimics municipal pressure systems and offers good reliability with proper well sizing.
Rainwater catchment with solar pump and RO drinking system
Rainwater feeds a roof catchment into a first‑flush diverter and large cistern. A solar-powered pump moves water through sediment and carbon filtration and an RO unit for drinking water. You’ll keep a backup disinfectant system for low sunlight periods.
Cost considerations and budgeting
Costs vary widely by source, capacity, and component quality. Budget for installation, materials, treatment, and ongoing maintenance.
Typical cost components
Expect costs for drilling or digging, pumps, tanks, piping, filtration equipment, electrical controls, and labor if you hire specialists. Simpler gravity systems can be a few thousand dollars, while full pumped/treatment systems often range from $10k–$50k or more for larger setups.
Table: Rough cost estimate ranges
| Component | Low Range | High Range |
|---|---|---|
| Well drilling | $1,000 | $15,000+ |
| Submersible pump | $300 | $2,000 |
| Storage tank (large cistern) | $500 | $5,000 |
| Filtration/treatment | $200 | $8,000 |
| Plumbing and fittings | $300 | $3,000 |
| Solar PV and batteries (for pumps) | $1,000 | $20,000 |
| Installation labor | $500 | $10,000+ |
When to call professionals
You can do many parts yourself, but call professionals for well drilling, complex electrical work, advanced filtration design, or when local codes require licensed installers. A pro can also perform detailed system sizing and ensure legal compliance.
Finding qualified contractors
Look for licensed well drillers, licensed electricians for PV and pump wiring, and certified water treatment professionals. Ask for references and proof of insurance.
Final checklist before first use
A final pre‑start checklist prevents mistakes and ensures safe water delivery. Follow each step carefully.
- Confirm permits and inspections (if required).
- Verify the pump and controls are properly wired and grounded.
- Check all valves are open/closed according to startup plan.
- Prime pumps (if required) and confirm no air locks.
- Disinfect system and flush until clean.
- Test water quality for bacteria and chemical contaminants.
- Record initial system pressures and flow rates for future comparison.
Summary and next steps
Setting up an off‑grid plumbing system is a manageable project when you plan for source, storage, pumping, treatment, and freeze protection. You’ll benefit from proper sizing, regular maintenance, and judicious use of automation and monitoring.
If you’re starting now, map your water sources and usage first, then create a phased plan: secure source and storage, install pumping and basic filtration, and add advanced treatment and automation in later phases. With careful planning and attention to detail, you’ll have a reliable water system that supports your off‑grid life for years to come.
Appendix: Useful formulas and quick references
- Flow rate conversion: 1 GPM = 1440 gallons per day. Use this to estimate daily demand from fixture GPM.
- Total Dynamic Head (TDH) = Vertical elevation gain + friction losses (pipe length and fittings) + required pressure head (psi × 2.31 ft/psi).
- Pressure head conversion: 1 psi = 2.31 feet of water.
If you want, you can tell me your source type, expected household size, and local climate and I’ll help you sketch a tailored system layout with sizing recommendations.