Have you ever wondered what it actually costs to live off‑grid and whether you can start while keeping your current job?
How Much Does It REALLY Cost To Go Off‑Grid? A Simple Breakdown For Beginners
How you approach off‑grid living will determine how much you spend. This article breaks down the real costs, gives realistic ranges, and offers a 30‑day action plan so you can begin without quitting your job. You’ll get clear numbers, practical tips to reduce expense, and a step‑by‑step month plan to move forward incrementally.
Why cost estimates vary so much
Off‑grid budgets span a huge range because people choose different levels of comfort, locations, and self‑reliance. You can aim for ultra‑minimalism with a few thousand dollars of upfront spending, or build a comfortable, long‑term off‑grid homestead that costs tens or hundreds of thousands. The variables that mostly control cost are land price, energy system size, water sourcing, housing type, and whether you do the labor yourself.
Big-picture categories of cost
To make sense of prices, think of costs in five major buckets: land, shelter, power, water & sewage, and lifestyle/operational costs. Each bucket has upfront (capital) costs and ongoing costs. You’ll want to plan for both types so you don’t run out of money after the initial build.
Land
Land price depends on location, acreage, zoning, access, and proximity to services. Remote rural parcels are cheaper per acre but may cost more to service. You’ll also need to consider property taxes and any required permits.
- Upfront: purchase price, closing costs, land surveys.
- Ongoing: property taxes, insurance, maintenance (access roads, brush clearing).
Shelter
Your housing choice drastically affects cost: a tiny house, converted vehicle, cabin, yurt, or stick‑built home all come with different prices and permitting needs. DIY builds save money but require time and skill.
- Upfront: materials, foundation, labor, insulation, windows, doors.
- Ongoing: maintenance, repairs, property insurance.
Power
Off‑grid power options include solar PV, battery storage, micro‑hydro, wind, and backup generators. Solar plus batteries is the most common route for beginners because of falling panel and battery prices and relative ease of installation.
- Upfront: panels, inverters, charge controllers, batteries, mounting hardware, installation.
- Ongoing: replacement of batteries every 5–15 years, occasional panel/inverter replacement, fuel and maintenance for generators.
Water & Sewage
You’ll need both water supply and wastewater management. Options include drilled wells, hauled water, rain harvesting, composting toilets, and septic systems.
- Upfront: drilling or well installation, pump, pump house, storage tanks, filtration, septic or composting toilet.
- Ongoing: electricity for pumps, well maintenance, filter replacements, septic pumping (if applicable).
Food, tools & living supplies
Growing some of your own food reduces ongoing grocery costs but requires initial investment in soil preparation, greenhouse or raised beds, seeds, tools, and irrigation. You’ll also need tools for construction and maintenance.
- Upfront: garden beds, greenhouse, seed stock, tools.
- Ongoing: seeds, soil amendments, feed, replacement tools, fuel for equipment.
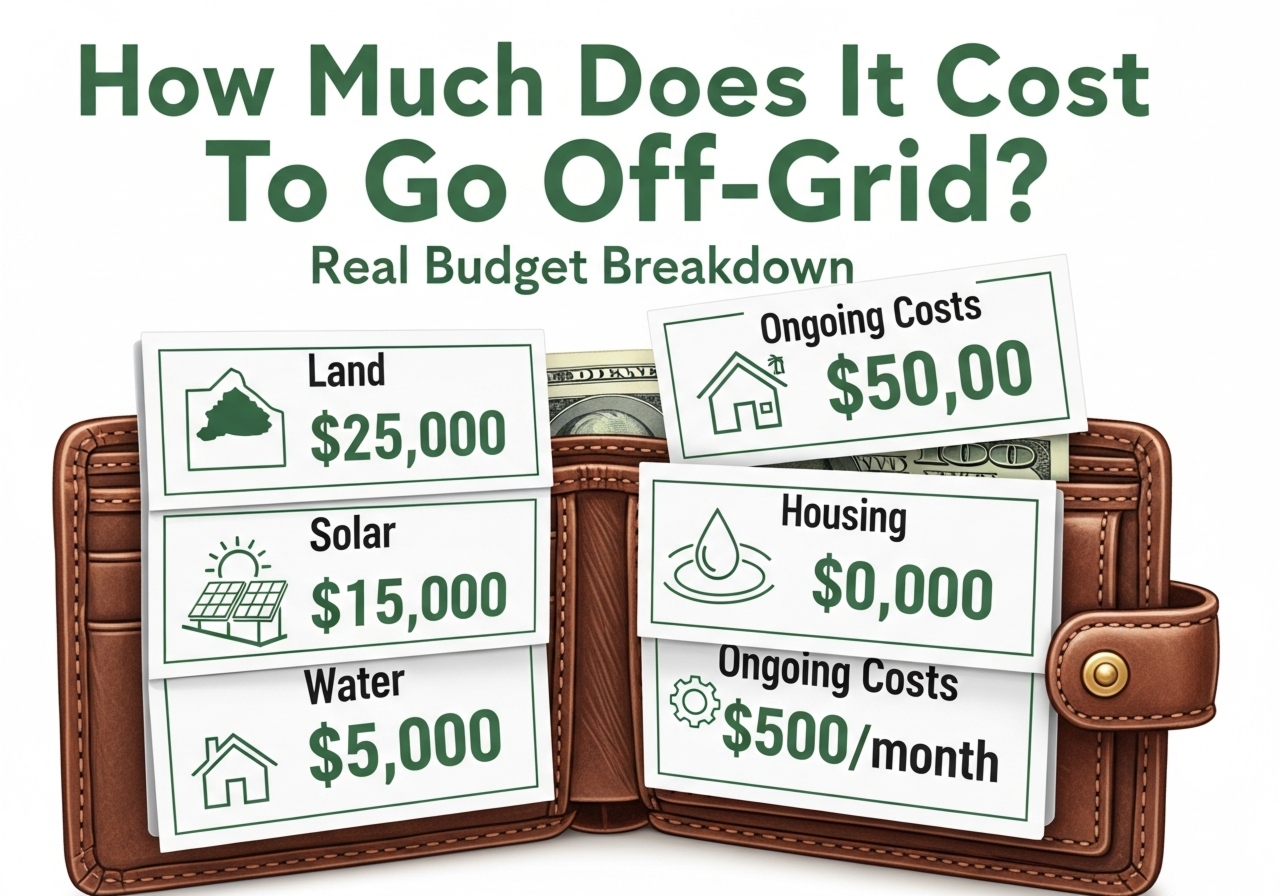
Typical cost ranges (summary table)
This table gives you a high‑level look at low, moderate, and high budgets for a basic off‑grid setup. These are illustrative and can vary greatly by region and personal choices.
| Category | Low Budget (DIY/minimal) | Moderate Budget (comfortable) | High Budget (fully built, high comfort) |
|---|---|---|---|
| Land (5–10 acres) | $5,000 – $25,000 | $25,000 – $100,000 | $100,000 – $500,000+ |
| Shelter | $3,000 – $25,000 | $25,000 – $150,000 | $150,000 – $500,000+ |
| Solar & Batteries | $2,000 – $8,000 | $8,000 – $40,000 | $40,000 – $150,000+ |
| Water (well/rain) | $500 – $10,000 | $10,000 – $30,000 | $30,000 – $75,000+ |
| Sewage (compost/septic) | $200 – $5,000 | $5,000 – $20,000 | $20,000 – $60,000+ |
| Food & Tools initial | $500 – $5,000 | $5,000 – $15,000 | $15,000 – $50,000+ |
| Ongoing annual | $1,000 – $5,000 | $5,000 – $15,000 | $15,000 – $40,000+ |
You can start with very little by combining low‑cost land, DIY shelter, and minimal energy systems. If you want a permanent homestead with modern comforts, plan for the moderate to high ranges.
Detailed breakdown: land costs
Land costs are the foundational decision. Location drives price and determines whether you can dig a well, get permits, or afford to store snow or deal with heavy rainfall. Zoning might prohibit certain types of dwellings, so research before buying.
What to check when you evaluate a parcel
You should check access roads, deed restrictions, zoning, well or spring presence, flood risk, slope, solar access, and tree cover. These factors can add thousands of dollars if you need road improvements, tree clearing, or can’t legally use a tiny house without a foundation.
Economies and tradeoffs
Buying very remote land saves purchase price but increases costs for transportation, connecting utilities (if you later choose), and delivering materials. Buying closer to a town raises land cost but reduces the cost and time of buildouts.
Detailed breakdown: shelter options and costs
Your shelter choice determines comfort, paperwork, and build complexity. You can prioritize mobility, minimal environmental impact, or full comfort. Each has a cost and regulatory implications.
Tiny houses on wheels
Tiny houses on trailers are popular because they can sometimes be classified as RVs, reducing permitting headaches. You still need to consider insulation, plumbing, and electrical safety.
- Typical cost: $10,000 (DIY basic) to $100,000 (professionally built).
- Pros: mobility, smaller footprint, lower heating needs.
- Cons: limited living space, zoning may restrict long‑term placement.
Shipping containers / modular cabins
Reusing shipping containers or kits can be cost‑efficient and quick. Insulation and retrofit costs are important to account for, especially in extreme climates.
- Typical cost: $15,000 – $100,000+ depending on finish and size.
- Pros: durable, quick to deploy.
- Cons: thermal bridging, structural modifications can be costly.
Stick‑built cabins / small homes
Traditional construction gives more control and resale value. You’ll need a foundation, full permits, and more time.
- Typical cost: $50,000 – $250,000+ depending on size and finish.
- Pros: comfort, legality, resale.
- Cons: higher upfront cost, longer build time.
Converting vehicles (skoolie, van)
Vehicle conversions are lower cost and allow mobility. You’ll need to consider how long you want to live in a vehicle and local laws about long‑term parking.
- Typical cost: $5,000 – $60,000 depending on base vehicle and finish.
- Pros: mobile, can be cheaper than building.
- Cons: limited space, maintenance, legal restrictions.
Detailed breakdown: power system costs
Power is one of the most frequent concerns. Your choice depends on how much electricity you need and whether you want 24/7 power or staged reliability.
Estimating energy needs
Start by listing your appliances and how many watt‑hours each uses per day. Typical off‑grid daily loads range:
- Minimal (lighting, phone charging, small fridge): 2–5 kWh/day.
- Moderate (fridge, freezer, lights, some power tools): 8–20 kWh/day.
- High (electric heating, full home appliances): 20–60+ kWh/day.
Your energy needs determine solar array size and battery bank capacity.
Components and cost ranges
| Component | Function | Typical cost range |
|---|---|---|
| Solar panels | Produce DC electricity | $0.30 – $1.00 per watt installed |
| Inverter | Converts DC to AC | $500 – $5,000 |
| Battery bank (Li‑ion) | Energy storage | $4,000 – $20,000+ |
| Charge controller | Manages charging | $200 – $2,000 |
| Generator (backup) | Emergency/peak supply | $500 – $10,000 |
A reliable off‑grid solar + battery system that supports a moderate household often costs between $15,000 and $40,000 installed. Smaller systems for tiny houses can be $3,000–$10,000.
Maintenance and lifecycle
Batteries require replacement—lead‑acid every 3–8 years, lithium 8–15 years depending on depth of discharge and cycles. Plan for a battery replacement fund and expect occasional inverter or panel issues.
Detailed breakdown: water systems and costs
Water is life. You’ll choose between drilling a well, hauling water, or harvesting rain. Each has tradeoffs in cost and reliability.
Drilled wells
Wells are common if you have access to groundwater. Cost depends on depth and geology.
- Typical cost: $3,000 – $15,000+ (includes pump and pressure tank).
- Pros: reliable long term.
- Cons: upfront cost and occasional pump failures.
Rainwater harvesting
Rain systems use roof runoff, gutters, and storage tanks plus filtration. Good in areas with predictable rainfall.
- Typical cost: $500 – $10,000 depending on tank size and filtration.
- Pros: lower environmental impact, can be DIY.
- Cons: seasonal variability, requires good filtration for drinking water.
Hauling water
Hauled water is cheapest initially but becomes expensive and inconvenient over time. Useful as a temporary solution.
- Typical cost: $50 – $200 per fill depending on distance and volume.
- Pros: low upfront cost.
- Cons: ongoing time and money, limited supply for irrigation or bathing.

Detailed breakdown: sewage and sanitation
Composting toilets, septic systems, and graywater reuse are common choices. Composting toilets are inexpensive and low maintenance. Septic systems require permits and excavation but handle larger flows.
- Composting toilet: $200 – $2,000 initial cost.
- Septic system: $5,000 – $30,000+ depending on site and regulation.
- Graywater systems: $500 – $5,000.
Plan for legal compliance. Some jurisdictions require septic permits or prohibit certain systems.
Ongoing & hidden costs
You’ll face ongoing expenses and occasional surprises. Accounting for these keeps you solvent.
- Property taxes and insurance.
- Fuel for chainsaws, generators, and vehicles.
- Replacement of batteries and pumps.
- Waste removal or septic pumping.
- Internet connectivity (satellite, cellular boosters).
- Medical emergencies and transport from remote locations.
A good rule is to budget an annual operating fund equal to 5–15% of your initial capital costs to cover maintenance and unexpected repairs.
How to dramatically reduce cost
You can phase your build and grow into off‑grid life over several years, keeping your current job. Here are strategies:
- Start with a small, legal dwelling (tiny house, van, or yurt) and add systems gradually.
- DIY labor for building, plumbing, and solar installation (get professional help for critical electrical and structural tasks).
- Buy used equipment: panels, inverters, and tools can be found in good condition.
- Prioritize essentials: clean water, safe shelter, and a basic energy system before luxury comforts.
- Choose land carefully: a cheaper remote parcel may cost more over time if you must haul all materials.
Sample budgets for three realistic approaches
Below are sample realistic budgets to give you an idea of what you might need based on three common approaches. These are illustrative and assume you already have transportation and some basic tools.
Budget A: Bare‑bones starter (minimal comfort, heavy DIY)
- Land (cheap, remote): $10,000
- Shelter (tiny cabin or converted van): $10,000
- Power (small solar, battery): $4,000
- Water (rain harvesting & basic filtration): $1,500
- Sanitation (composting toilet): $500
- Tools, garden start: $1,500
- Contingency/permits: $2,000 Total upfront: ~$29,500 Estimated ongoing annual: $1,500 – $3,000
B: Mid‑range comfortable homestead
- Land: $50,000
- Shelter (small stick‑built home): $80,000
- Power (robust solar + batteries + generator): $25,000
- Water (drilled well, storage, filtration): $12,000
- Septic system: $10,000
- Garden & livestock startup: $7,000
- Contingency/permits: $10,000 Total upfront: ~$194,000 Estimated ongoing annual: $5,000 – $12,000
C: High‑comfort, long‑term homestead
- Land: $200,000+
- Shelter (custom home): $300,000+
- Power (large solar + batteries + micro‑hydro/wind): $100,000+
- Water & wastewater: $50,000+
- Outbuildings, workshop, equipment: $75,000+
- Contingency/permits: $25,000+ Total upfront: $750,000+ Estimated ongoing annual: $15,000 – $40,000+
These budgets show the enormous range. A staged approach lets you start at Budget A and incrementally add systems until you reach Budget B or C as desired.
Financing and creative ways to fund your project
You don’t have to have all the cash upfront. Here are options to finance your off‑grid journey:
- Personal savings and emergency fund first.
- Home equity loans or lines of credit (if you have property).
- Construction loans for stick‑built homes.
- RV loans for tiny houses on wheels (if classified as RV).
- Crowdfunding or community investment for shared projects.
- Bartering skills for labor or materials with local tradespeople.
- Selling or renting out a current home to free capital.
Be cautious with high‑interest loans and ensure your cash flow supports loan payments while living on site.
Legal, zoning, and permitting considerations
Before you buy or build, check local rules. Some areas restrict tiny homes, RVs, and septic systems. You should understand setback requirements, building codes, and whether you can legally live on the land year‑round.
- Call the local planning department and ask specific questions.
- Ask about well and septic permits as well as electrical regulations for off‑grid systems.
- Get written or recorded clarifications if possible to avoid surprises later.
Health, safety, and resilience
Going off‑grid increases distance to emergency services. Consider medical plans and safety measures. Put together first‑aid kits, communications (satellite phone or emergency beacon), and evacuation plans.
- Keep a reliable vehicle or community contact for emergencies.
- Maintain equipment to avoid sudden failures.
- Store backup fuel and spare parts for critical systems.
Timeline expectations
Your build timeline depends on complexity and permits. A simple tiny house and basic solar can be set up in a few months. A full homestead with well, septic, and stick‑built home can take a year or more. Planning and permits often take longer than construction.
30‑Day Action Plan to Start Your Off‑Grid Journey Without Quitting Your Job
This plan is designed so you can make meaningful progress in one month while keeping your job. Each week focuses on researching, planning, and small actions that set you up for gradual transition.
Week 1 — Vision, priorities, and basic research (Days 1–7)
Day 1: Clarify your why and non‑negotiables. Write down what you want from off‑grid life, acceptable tradeoffs, and a 1‑year, 3‑year vision. This anchors decisions and budget choices.
Day 2: Estimate your current monthly living costs. Track bills for housing, groceries, utilities, insurance, and debt payments. This gives a baseline for future comparisons.
Day 3: List your desired off‑grid daily energy needs. Note heating/cooling, fridge, lights, pumps, and tools. You’ll use this to size solar systems.
Day 4: Research regions that match your climate and budget. Consider land price trends, water availability, and distance from family or necessary services.
Day 5: Identify zoning rules in one or two target counties. Email or call planning departments to ask about tiny houses, RV living, wells, and septic.
Day 6: Join two online communities or forums focused on off‑grid living. Observe common pitfalls and ask one or two specific questions about costs in your target regions.
Day 7: Consolidate what you learned and set a 3‑month research goal. Decide which land parcels or regions earn a closer look.
Week 2 — Budgeting, funding, and skill assessment (Days 8–14)
Day 8: Build a simple spreadsheet for projected costs across land, shelter, power, water, and sanitation. Use the sample costs in this article to estimate totals.
Day 9: Inventory your skills and tools. Note what you can DIY and what you will hire out. Include plumbing, carpentry, electrical, and mechanical skills.
Day 10: Contact a local lender or financial advisor about loan options if you plan to finance. Ask pre‑approval questions that affect purchase timelines.
Day 11: Research used equipment marketplaces for solar panels, inverters, and batteries. Save listings that look like viable bargains.
Day 12: Identify at least two possible income strategies to supplement savings while transitioning (remote work, seasonal work, freelancing). Start researching how to convert your current job into more flexible work if needed.
Day 13: Make a prioritized list of must‑have items vs nice‑to‑have items for your first setup. This will guide phasing.
Day 14: Draft a 12‑month funding plan that includes savings targets, expected sales (if selling a home or assets), and projected loan amounts.
Week 3 — Land scouting and systems planning (Days 15–21)
Day 15: Narrow to 1–3 parcels to investigate more deeply. Request property disclosures, maps, and any known restrictions.
Day 16: Arrange one site visit (or virtual visit) for the top property. Take photos, note solar exposure, water sources, and access roads.
Day 17: Get a preliminary well and septic feasibility check. Contact local drillers or septic installers for ballpark quotes.
Day 18: Contact a solar installer or experienced DIYer to get a preliminary quote based on your energy estimate. Ask about battery lifecycle and warranty.
Day 19: Sketch a simple site plan for your preferred parcel: where the shelter, water collection, solar arrays, and septic might go. This will clarify costs and permit needs.
Day 20: Research local service providers for cell or satellite internet so you can maintain income remotely. List options and costs.
Day 21: Review safety and emergency access. Identify the nearest hospital, fire department, and main roads. Make a contingency plan for medical or weather emergencies.
Week 4 — Commit to a phased timeline and start procurement (Days 22–30)
Day 22: Decide on your first build phase (e.g., tiny shelter + basic solar + rainwater). Confirm a realistic budget for phase 1.
Day 23: Begin buying critical items that are frequently back‑ordered or cheaper used: solar panels, inverters, or water tanks. Stick to your budget and prioritize portability.
Day 24: If buying land, start the necessary steps for purchase: formal offer, earnest money, and title review. If renting or leasing land, negotiate terms.
Day 25: Arrange temporary accommodation options for the initial move (camping gear, short‑term rental, or friend’s property). Confirm where you’ll stay during construction.
Day 26: Contact contractors for quotes you’ll need in Phase 1 (well drillers, septic installers, foundation workers). Book appointments where necessary.
Day 27: Start building a tools and supplies list and purchase one or two key tools you’ll use immediately, like a quality drill and safety gear.
28: If you need to adjust your job schedule, propose a flexible plan to your employer (remote days or compressed hours) or begin exploring part‑time remote opportunities.
29: Finalize a 6‑month timeline with milestones: land acquisition, shelter delivery, water system, power system, and first harvest. Include contingencies.
Day 30: Celebrate the progress and write a short checklist of the next 90 days. Highlight what you’ll pay for, what you’ll DIY, and what requires permits.
Practical tips to avoid common mistakes
You’ll save time and money by learning from others’ experiences. Here are common missteps and how to avoid them:
- Don’t buy land without checking wells, septic, and access. A cheap lot can become expensive quickly.
- Don’t undersize batteries or solar arrays for your needs; oversized in the wrong places is easier to adapt than undersized reliability.
- Don’t ignore permits if you plan to sell later—legal noncompliance can lower resale value or result in fines.
- Don’t assume everything can be DIY safely—get licensed pros for structural and critical electrical work.
- Don’t skip realistic timelines; permits and inspections often take longer than you expect.
Final considerations and realistic expectations
Off‑grid living is rewarding but requires planning, patience, and flexibility. You’ll likely discover that the transition is an iterative process rather than a single dramatic shift. Many successful off‑grid pioneers started with a van or tiny cabin, learned skills, and gradually added land, water, and more robust systems.
You’ll find that moving off‑grid is not just about money—it’s about the lifestyle tradeoffs you choose and how much time you can invest in learning and maintaining systems. If you keep your job while you build, you maintain financial stability and give yourself time to grow into each new capability.
If you follow the 30‑day action plan, you’ll have a clear foundation—vision, budget, land shortlist, and a phase‑one plan—without needing to quit your job immediately. From there, you can extend your build at your own pace, fund it sensibly, and enjoy the gradual, practical journey toward greater self‑reliance.