Are you planning to live off-grid and need reliable, safe ways to manage human waste without a sewer connection?

Off-Grid Waste Systems: Composting, Incinerating & DIY Toilets
This article is designed to give you practical, friendly guidance on off-grid waste systems. You’ll find clear explanations of composting toilets, incinerating toilets, and DIY toilet options, plus design tips, maintenance schedules, safety concerns, and comparisons to help you choose the right approach for your situation.
Why off-grid waste systems matter
Managing human waste properly protects your health, preserves water resources, and prevents pollution of soil and waterways. When you’re off-grid, you can’t rely on municipal sewers. You need systems that are suited to your climate, water availability, budget, and local regulations. This section helps you understand the big picture so you can make informed choices.
Understanding waste streams: graywater vs. blackwater
Recognizing the difference between types of wastewater lets you design systems that treat each stream appropriately. Graywater comes from sinks, showers, and laundry; it usually contains soap, oils, and organic material. Blackwater is toilet waste and contains pathogens; it needs higher levels of treatment or safe disposal. Treating and reusing graywater is often easier and lower risk than treating blackwater.
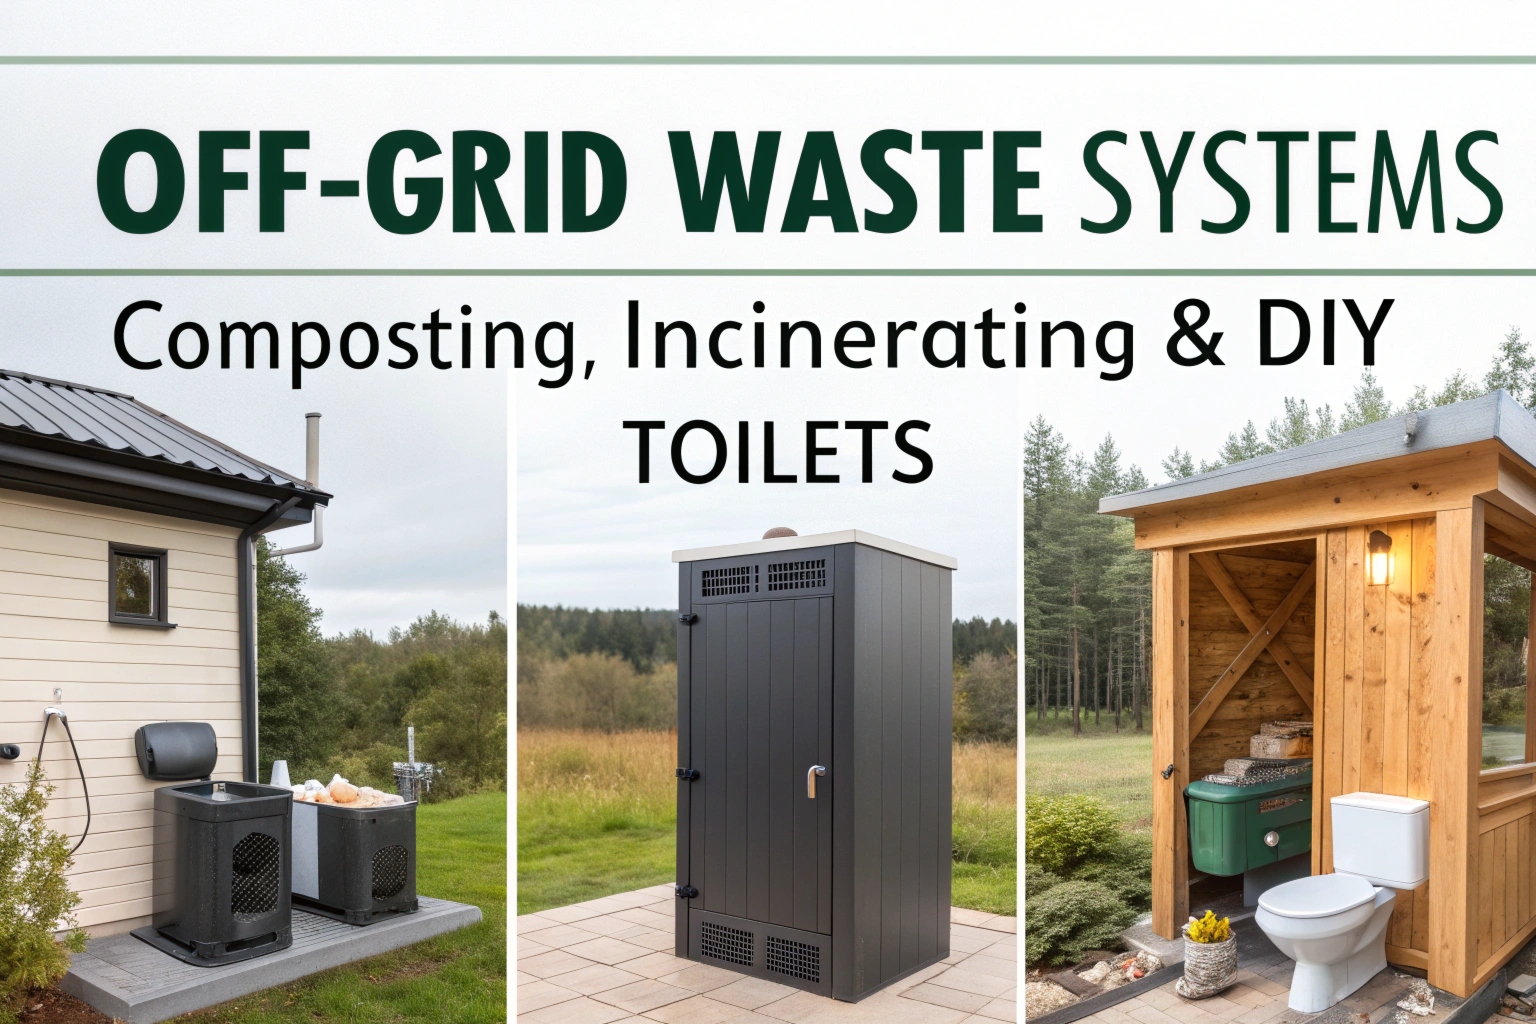
Overview of off-grid toilet types
There are several categories of toilets you can consider. Each has different water needs, maintenance requirements, and risks.
- Composting toilets: Use biological decomposition to turn human waste into compost. Often dry or low-water systems.
- Incinerating toilets: Burn waste to sterile ash using electric, gas, or liquid fuel.
- Pit latrines and VIP latrines: Simple, low-cost pits in the ground, sometimes with ventilation.
- Urine-diverting dry toilets (UDDT): Separate urine and feces to reduce volume and pathogen risk.
- Bucket/sawdust toilets: Very simple, using a container and carbon cover.
- Anaerobic digesters/biogas toilets: Create methane from waste while reducing solids.
Later sections will go into detail on composting and incinerating toilets and step-by-step DIY options.
Comparing systems at a glance
This table summarizes core differences to help you narrow choices quickly.
| System type | Water use | Treatment level | Energy needs | Typical maintenance | Best for |
|---|---|---|---|---|---|
| Composting toilet | Low to none | High if properly managed | Low (vent fan) | Regular emptying/compost curing | Remote homes, cabins, eco-builds |
| Incinerating toilet | None | Sterilizes to ash | Moderate to high (fuel or electricity) | Ash disposal, periodic checks | Boats, RVs, sites where composting not permitted |
| Pit latrine | None | Low (on-site decomposition) | None | Pit excavation, relocation | Rural, low-cost, low-density sites |
| UDDT | None | High if feces composted | Low | Emptying, urine storage | Water-scarce areas, reuse of nutrients |
| Bucket/sawdust | None | Moderate with good composting | None | Daily addition of carbon, emptying | Emergency use, very low budget |
| Anaerobic digester | Low | Produces biogas, reduces solids | Some (mixing) | Sludge removal, gas management | Integrated energy + sanitation solutions |
Composting toilets — how they work
Composting toilets use aerobic decomposition to break down feces, toilet paper, and sometimes food scraps. Microorganisms and, in some systems, worms (vermicomposting) convert organic matter into stabilized compost. Proper operation depends on balancing carbon and nitrogen, controlling moisture, and providing oxygen.
Types of composting toilets
You’ll encounter a few common types:
- Continuous composting (single chamber): Waste is added to one chamber where decomposition occurs continuously. You remove finished compost periodically.
- Batch systems (multi-chamber): You fill one chamber until full, then let it mature while using another chamber. This simplifies pathogen die-off.
- Vermicomposting toilets: Add composting worms to speed breakdown and reduce odors.
- Urine-diverting composting toilets: Separate urine to reduce moisture and speed composting of solids.
Each design has trade-offs in complexity, odor control, and pathogen management.
Key principles for effective composting
For reliable results, manage four main factors:
- Carbon to nitrogen ratio (C:N): Aim for a C:N ratio around 20–30:1 for efficient decomposition. Human feces are higher in nitrogen; add carbon-rich bulking agents such as sawdust, wood chips, straw, or dry leaves.
- Moisture: Keep piles moist like a wrung-out sponge. Too wet and you risk anaerobic conditions and odors; too dry and decomposition slows.
- Aeration: Provide passive or active airflow. Vent stacks and small exhaust fans help keep aerobic microbes active and control odor.
- Temperature and time: Warmer composting (thermophilic) accelerates pathogen kill, but even mesophilic composting with longer curing times can be safe if managed properly.
Safe handling and pathogen reduction
Human pathogens (bacteria, viruses, helminth eggs) are the main health concern. You can lower risks by:
- Using batch systems and allowing long curing times (commonly 6–12 months or more depending on climate).
- Encouraging thermophilic phases (temperatures > 55°C) if possible, to inactivate many pathogens.
- Covering fresh waste with carbon after each use.
- Avoiding direct contact with raw material; use gloves and tools.
- Limiting use of finished compost to non-food plants (e.g., ornamental trees, fuel wood) unless local guidance or more rigorous treatment permits use on crops.
Follow local regulations and WHO guidance for safe reuse.
Building a basic composting toilet (DIY)
You can build a simple, effective composting toilet with common materials. Here’s a practical step-by-step for a single-family cabin using a two-chamber batch approach.
Materials:
- Two sturdy containers or 55-gallon drums, or build wooden boxes with plywood.
- Toilet seat and lid.
- Vent stack (PVC) and exterior vent head.
- Small 12V DC fan for ventilation (optional but recommended).
- Carbon bulking agent: kiln-dried sawdust, wood shavings, or coconut coir.
- Tools and sealants.
Steps:
- Install the toilet seat on chamber A and make chamber B accessible for later use.
- Fit a vent stack through the roof or outside wall; attach the fan near the inlet to draw air from the toilet bowl through the chamber and out.
- Provide a removable access panel or door for emptying finished compost.
- After each use, add a scoop of sawdust (about 200–500 mL) to cover the feces and control moisture/odors.
- When chamber A is full, switch to chamber B and allow chamber A to cure for at least 6–12 months. During that time, the material will break down and stabilize.
- Remove finished compost using protective gear and place it in a curing bin or apply according to safety guidance.
Maintenance and troubleshooting for composting toilets
Regular checks reduce problems. Keep an eye on:
- Odor: Usually caused by excess moisture or insufficient carbon. Add more dry cover and improve airflow.
- Flies: Keep the bowl sealed when not in use, maintain a layer of cover material, and use mesh screens on vents.
- Slow decomposition: Add bulking material to improve aeration; mixing or turning can help if your system allows it.
- Freezing issues: Insulate the chamber or place it indoors in very cold climates.
Maintenance schedule:
- Daily: Add carbon after use; check ventilation.
- Weekly: Empty condensate or check fan function.
- Monthly: Inspect chambers for odors, moisture, compaction.
- When full: Move to curing and clean; replace liners if used.
Incinerating toilets — what you should know
Incinerating toilets reduce waste to a small amount of sterile ash. They are attractive when you want minimal handling and no soil contamination. They are used in boats, RVs, tiny houses, and some remote cabins.
How incinerating toilets work
These toilets use controlled combustion to oxidize solids and liquids at high temperature. Models vary: electric, gas/propane, or diesel-fueled. Combustion cycles usually last from 30 minutes to a few hours depending on technology and waste load. After burning, you remove a small amount of ash that forms the final residue.
Pros and cons
Advantages:
- No long-term storage of raw human waste.
- Minimal smell when operating correctly.
- Small volume of sterile ash is easy to handle.
- Useful where composting isn’t allowed or not feasible.
Disadvantages:
- Energy or fuel demand can be significant; plan for power supply if you’re off-grid.
- Initial equipment cost can be high.
- Emissions need attention; you must ensure adequate combustion and filtration where required.
- Mechanical or electrical failure could leave you without a usable system.
Energy and emissions considerations
Electric incineration units may draw substantial power during a burn cycle; you’ll need batteries, solar panels, or a generator capable of supporting that demand. Gas or liquid fuel variants need accessible and safe fuel storage and ventilation. Review manufacturer specifications carefully and ensure your off-grid power or fuel system can meet those needs.
Emissions management is important. High-temperature combustion minimizes odors and incomplete combustion products, but local regulations may restrict open emissions. Some units include catalytic converters or filters; follow local law and manufacturer guidance.
Maintenance and operation
Routine tasks include:
- Removing ash after each burn or as recommended.
- Inspecting burners, electrodes, or igniters.
- Checking seals and venting for blockages.
- Following manufacturer schedules for component replacement.
Incinerators are mechanical devices—serviceability and access to replacement parts are worth checking before you buy.
DIY toilet options — simple builds and when to use them
If you want a low-cost, low-tech approach, some DIY options are practical, safe, and effective when managed properly. Here are common DIY variants with brief construction guidance and considerations.
Sawdust bucket (bucket toilet)
This is the simplest system and is widely used in emergency and temporary setups.
How it works:
- A durable bucket with a tight-fitting lid holds waste.
- After each use, you add a scoop of sawdust, dry leaf matter, or ash to cover the feces.
- When the bucket is full, you seal it, allow it to compost off-site for a long period, then dispose of or process the material according to safety guidance.
Pros:
- Extremely low cost and portable.
- No plumbing needed.
Cons:
- Requires disciplined users to add cover material.
- Needs secure storage while curing.
- Odor and fly control depend on proper covering.
Safety:
- Use heavy-duty bins with tight lids and follow glove use when handling.
Urine-diverting dry toilet (UDDT) — DIY version
A UDDT separates urine at the source, typically using a sloped front section to capture urine and a rear section for solids. Urine can be diverted into sealed containers for storage or direct dilution and application as fertilizer if local rules allow.
Basic steps:
- Build a seat with a sloped insert to channel urine to a pipe/bottle.
- Provide a solids receptacle with space for carbon covering.
- Vent the solids chamber and include a fly-proof screen.
- Store urine in containers fitted with lids; store for the recommended period or treat as required before agricultural use.
Benefits:
- Reduced solids volume and faster solid composting.
- Urine is a concentrated nutrient resource (mainly nitrogen).
Cautions:
- Handle urine with care and follow safe reuse guidelines. Urine storage recommendations vary with climate and intended reuse; check local health guidance.
Arborloo and Fossa alterna (simple pit-based DIY)
If your site allows pit systems, these designs allow simple pit use with eventual tree planting:
- Arborloo: Shallow pit is used until nearly full, then a shallow soil layer covers the pit and a tree is planted directly on top.
- Fossa alterna: Alternating shallow pits are used for two-season deposition and composting, resulting in more stabilized material for use.
These systems are best for rural settings with sufficient land area and where groundwater contamination is not a risk.

Graywater management and integration
To get the most from off-grid water reuse, treat graywater separately. Graywater from showers and sinks is easier to treat and can be used for irrigation of ornamental plants and trees if treated adequately.
Common graywater systems:
- Simple gravity-fed distribution to mulch basins (avoid food crops).
- Sand filters and gravel beds to remove solids.
- Constructed wetlands or reed beds for biological treatment and polishing.
- Subsurface drip irrigation after sufficient treatment to avoid human contact.
Precautions:
- Use biodegradable, low-phosphate, and low-surfactant soaps to protect system biology.
- Avoid storing untreated graywater for long periods to limit pathogen growth.
- Follow local regulations on reuse and avoid applying graywater to leafy crops or root crops eaten raw.
Health, safety, and regulations
Human waste can transmit disease if not managed well. You must prioritize safe handling, protective gear, and compliance with regulations.
Key safety practices:
- Always wear gloves when handling raw waste or emptying toilets.
- Wash hands thoroughly with soap or use hand sanitizer.
- Keep children and pets away from storage and processing areas.
- Clearly label storage containers and maintain secure lids.
- Use appropriate PPE (gloves, eye protection, masks if generating dust).
Regulatory considerations:
- Local codes vary widely. Some jurisdictions restrict composting or incineration, or require permits for certain on-site systems. Before installing, check with local health departments, building departments, or environmental agencies.
- If you plan to reuse compost or urine for agriculture, follow local rules and recognized guidance (e.g., WHO or local agricultural extension services) regarding treatment, crop restrictions, and storage times.
Choosing the right system for your situation
Factors to weigh:
- Climate: Cold climates can slow composting; insulation or indoor chambers help. Arid climates favor UDDTs and pit systems where groundwater is deep.
- Household size: Larger households create more waste and may need larger capacity systems or more frequent maintenance.
- Water availability: If you have limited water, dry systems (composting, UDDT, incinerating) are preferable.
- Power and fuel availability: Incinerating toilets require reliable electricity or fuel. Composting toilets typically need minimal power for a small vent fan.
- Land and soil: Pit systems require appropriate soil and sufficient distance from groundwater.
- Budget and DIY skill: Simple sawdust bucket or UDDT systems are budget-friendly. Commercial composting systems cost more but require less hands-on management.
Troubleshooting common issues
Here are common problems and quick fixes:
- Persistent odor: Check moisture and carbon cover. Increase sawdust or other dry cover and inspect ventilation for blockages.
- Flies and insects: Ensure tight seals, use screens on vents, and keep a layer of cover material.
- Slow decomposition: Add more carbon or wood chips for aeration; if possible, increase ambient temperature or insulate the chamber.
- Freezing: Insulate chambers and consider placing them indoors or in insulated enclosures.
- Incinerator won’t ignite: Check fuel supply, battery power, igniter components, and safety circuits. Have a backup toilet plan.
- Urine containers smell or leak: Use sealed containers, dilute or treat urine promptly, and ventilate storage.
Costs and lifecycle considerations
Costs vary widely by system, materials, and installation complexity. Approximate ranges (very general):
- DIY sawdust bucket: $20–$200 for materials.
- Homebuilt UDDT or two-chamber composting system: $200–$1,000 depending on materials and finish.
- Commercial composting toilets: $1,000–$5,000+ depending on capacity and features.
- Incinerating toilets: $1,500–$7,000+ depending on model and fuel type.
Consider lifecycle expenses:
- Fuel and power for incinerators.
- Carbon supply (sawdust, shavings) for composting toilets.
- Replacement fans, seals, and other wear items.
- Labor for emptying and maintenance.
Choosing a system with locally available spare parts and service options reduces long-term costs and headaches.
Practical recommendations by scenario
These recommendations help you match system to common off-grid situations:
- Remote cabin for two people with limited power: A two-chamber batch composting toilet or a UDDT with small fan works well.
- Family of four in a year-round off-grid home: A robust commercial composting system or well-built DIY multi-chamber system; consider backup options for cold months.
- Boat or small RV: Incinerating or specially designed marine composting toilets that handle motion and space constraints.
- Dry, hot climate: UDDTs or pit-based options like Arborloo work well. Composting is faster in warm climates.
- Cold climates: Insulate or place composting chambers indoors; consider vermicomposting indoors or hybrid systems with external composting in summer and storage in winter.
Final checklist before you commit
Before you install any system, go through this checklist:
- Have you checked local regulations and obtained necessary permits?
- Is your chosen system appropriate for your climate and household size?
- Do you have supplies (carbon material, fuel, spare parts) accessible long-term?
- Have you planned for safe emptying, storage, and final disposal or reuse of residues?
- Do you have contingency plans if the primary system fails?
Closing recommendations
If you’re uncertain which path to take, begin with a conservative, low-cost option such as a sawdust bucket or UDDT while you learn how your household’s usage patterns and local conditions affect system performance. Composting toilets provide an environmentally friendly, low-energy solution if you’re willing to manage composting properly. Incinerating toilets offer convenience and minimal handling but require reliable power or fuel and higher upfront costs. DIY systems can work well with careful design, consistent user habits, and attention to hygiene.
If you need a step-by-step build plan tailored to your site, a cost estimate for your household, or a checklist to ensure regulatory compliance in your area, tell me about your location, household size, climate, and preferences, and I’ll help you design a practical off-grid waste solution.