Want to keep your food safe, tasty, and usable when you don’t have a fridge?
")
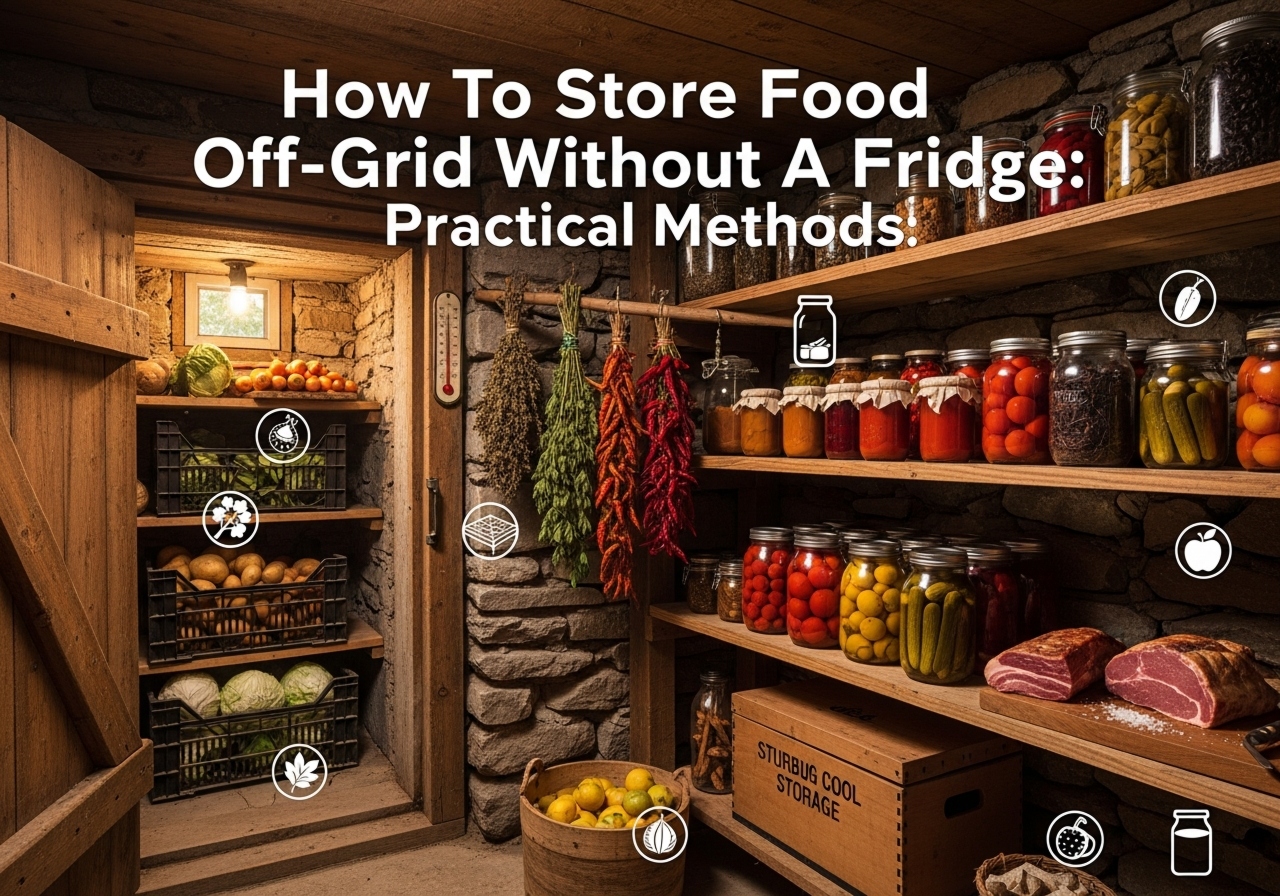
How To Store Food Off‑Grid Without A Fridge (Practical Methods That Actually Work)
You can rely on several time-tested and modern methods to store food off‑grid without a refrigerator. This guide walks you through practical options—what works best for which foods, how long items last, what equipment you need, and the safety steps to prevent spoilage and illness.
Why off‑grid food storage matters
When you’re off the grid, refrigeration isn’t always available, reliable, or desirable because of power limits. You still want meals that are nutritious, safe, and convenient. Learning a range of preservation methods gives you flexibility: conserve harvests, reduce waste, and create a food plan that fits your climate, skills, and storage space.
Basic principles of preservation
Any preservation method controls one or more of the factors that let microbes and enzymes spoil food: temperature, moisture, oxygen, acidity, salt/sugar concentration, and microbial competition. Understanding these basics helps you choose and combine methods effectively.
Major Off‑Grid Preservation Methods — Overview
You’ll find methods that reduce moisture (dehydration), alter acidity (pickling), kill microbes (canning, smoking), create inhospitable environments (salt, sugar, vacuum), or use stable low temperatures (root cellars, icehouses). Each method has tradeoffs in flavor, shelf life, nutrition, equipment needs, and safety risk.
Short list of methods you’ll learn about
- Canning (water bath and pressure)
- Dehydrating (sun and solar or electric dehydrators)
- Freezing alternatives (icehouse, springhouse, natural cold)
- Root cellaring and cool storage (root cellar, cellar boxes)
- Fermentation and pickling
- Smoking and curing (salt curing, nitrates)
- Sugaring and jam/jelly preservation
- Vacuum sealing and oxygen absorbers for dry goods
- Evaporative cooling (clay pot coolers / zeer pots)
- Dry goods storage (grains, beans, legumes)
Each section below gives purpose, foods suited, steps, equipment, shelf life, pros/cons, and safety tips.
Canning (Water Bath and Pressure)
Canning is a classic way to make food shelf‑stable by sealing it in a jar and applying heat to destroy spoilage organisms and inactivate enzymes. You’ll choose water bath canning for high‑acid foods and pressure canning for low‑acid items.
What canning does and what it’s best for
Canning removes air, creates a vacuum seal, and uses heat to kill bacteria and enzymes. Water bath canning is best for fruits, jams, pickles, and high‑acid tomato products (with lemon juice or acidification). Pressure canning is essential for low‑acid foods like vegetables, meats, and soups to prevent botulism.
Typical shelf life
Properly canned goods can last 1–5 years when stored cool and dark. Flavor and texture may decline over time, but safety commonly remains if jars are sealed and undamaged.
Basic steps (high level)
- Prepare jars and lids; keep jars warm.
- Prepare food (cook if required), fill jars leaving headspace.
- Remove air bubbles, wipe rims, apply lids and rings.
- Process jars in boiling water (water bath) or pressure canner per tested times and pressures.
- Cool jars, check seals, label and store.
Always follow tested recipes and processing times from reliable sources (e.g., USDA or university extension), because small deviations can be dangerous.
Equipment needed
- Mason jars with two‑piece lids
- Large pot (water bath) or pressure canner
- Jar lifter, funnel, bubble remover tool
- Heat source (wood stove, gas, propane, or other off‑grid option)
Pros and cons
Pros: Long shelf life, keeps nutrients reasonably well, preserves flavor, versatile for many foods.
Cons: Requires exact processing for safety, energy intensive, heavier to store and transport.
Safety tips
- Use tested recipes for processing times and pressures.
- Acidify tomatoes and low‑acid foods as directed.
- Don’t use cracked jars, warped lids, or reuse single‑use lids.
- Reject jars with bulging lids, leakage, off smells, or visible mold.
Dehydrating (Drying)
Removing moisture prevents microbial growth and slows chemical reactions. Dehydration is lightweight, low energy (if using solar), and excellent for fruits, herbs, vegetables, and meats (jerky).
What it’s best for
Fruits, vegetables, herbs, mushrooms, and meats (as jerky). Dehydrated foods are compact and rehydrate quickly for soups and stews.
Typical shelf life
Dehydrated foods stored well (vacuum sealed, cool, dry) can last 6 months to several years depending on the food and storage conditions.
How to dry without much power
- Air dry in low humidity, warm areas with good airflow.
- Use a solar dehydrator (simple box with vents and black trays).
- Oven drying at low temperatures if you have occasional power or using a wood stoves with an oven compartment.
- Dehydrate over a low fire using racks and a smoked roofline for jerky (ensure safe temperatures).
Steps for basic fruit drying
- Wash and slice evenly.
- Pretreat certain fruits (lemon juice, ascorbic acid) to reduce browning.
- Arrange on racks with airflow.
- Dry until leathery or brittle depending on the item.
- Condition (equalize moisture among batches) and store.
Equipment needed
- Racks, mesh trays, screens
- Solar dehydrator (optional), oven, or smoker
- Airtight storage bags or jars; oxygen absorbers for long storage
Pros and cons
Pros: Low weight, reduced bulk, long shelf life, less energy than canning sometimes.
Cons: Texture changes, rehydration needed for many dishes, possible nutrient losses (some vitamins sensitive to heat/light).
Safety tips
- For jerky, ensure thorough drying and safe marination practices; consider a brief low‑temperature oven or steaming before drying to kill surface pathogens.
- Prevent contamination during cooldown and storage.
Freezing Alternatives (Natural Cold Storage, Ice Houses, and Snow Storage)
If you don’t have electricity, you can still use nature or passive systems to achieve cold temperatures for storage.
What this covers
Methods include root cellars, springhouses, icehouses (ice harvested and stored), and using natural snow/ice caches. These methods let you store perishable items at low but not freezing or moderately freezing temperatures.
Best foods for cold storage alternatives
Vegetables (carrots, potatoes, beets), apples, cabbage, fermented items, dairy in cooler climates, and some meats short‑term if iced.
Typical shelf life
Varies: root cellar vegetables can last months; icehouses can store perishables at near‑freezing for weeks to months depending on the ice supply and insulation.
How to build/use a root cellar or icehouse
- Root cellar: cool, dark, humid space 32–50°F (0–10°C) with good ventilation and insulated walls. Store produce in bins or shelves; use sand or burlap for insulation around delicate roots.
- Icehouse: deeply insulated building with drainage to store harvested ice below grade; ice lasts longer with thick insulation and small doors.
Pros and cons
Pros: Low energy once built, excellent for certain vegetables and fruits, preserves texture.
Cons: Requires initial construction, climate‑dependent, limited for meats unless iced, pests can be an issue.
Safety tips
- Monitor humidity and temperature to prevent freezing or warming cycles that degrade produce.
- Keep produce dry (except for items like potatoes that like humidity) to avoid rot.
- Protect entry from pests and rodents.
Fermentation and Pickling
Fermentation uses beneficial microbes to preserve food while creating probiotics and unique flavors. Pickling often uses vinegar to create an acidic environment.
What they do and what they’re best for
Fermentation is ideal for cabbage (sauerkraut), cucumbers (lacto‑fermented pickles), dairy (yogurt, kefir), and many vegetables. Pickling with vinegar is great for quick pickles and preserves that are flavorful and shelf‑stable (if canned).
Typical shelf life
Fermented foods can last months in cool storage; canned pickles last 1–2 years when processed. Shelf life depends on salt concentration, acidity, and storage conditions.
Basic fermentation steps (lacto‑fermentation)
- Clean and weigh down the vegetables in a brine (saltwater) to exclude air.
- Keep at a steady temperature (60–75°F is typical for many ferments).
- Allow beneficial lactobacilli to acidify the food (several days to weeks).
- Store in cool conditions to slow fermentation once desired flavor is reached.
Equipment needed
- Glass crocks or jars, weights, airlock or loose lids (burping)
- Salt and non‑chlorinated water (chlorine can inhibit cultures)
Pros and cons
Pros: Adds nutrition and flavor, low energy, forgiving and sustainable.
Cons: Requires attention to brine and cleanliness, flavor may be unfamiliar for some, variable shelf life.
Safety tips
- Use appropriate salt ratios and keep food submerged in brine to prevent mold.
- Discard if you see slimy textures, strong rotten odors, or active mold growth (white kahm yeast is common but not harmful; assess carefully).
Smoking and Curing (Salt, Sugar, Nitrates)
Smoking and curing remove moisture and add antimicrobial components (salt, smoke compounds). These methods are traditional for meats and fish.
What they’re best for
Meats, fish, and some cheeses or vegetables can be smoked or salt‑cured for long storage.
Typical shelf life
Properly cured and smoked meats, kept cool and dry, can last from several weeks to months. Dry cured hams and sausages, when made correctly, can keep much longer.
Steps for basic cold smoking/cure
- Cure with salt (and sugar/nitrates if appropriate) to draw moisture out and inhibit growth.
- Rinse and dry the surface.
- Smoke at low temperatures for flavor and additional preservation (cold smoking at 70–90°F only flavors; hot smoking cooks and preserves).
- Store in cool, dry conditions.
Equipment needed
- Smoking chamber (simple offset, rocket stove smoker, or improvised smoker)
- Curing salts, racks, hooks
Pros and cons
Pros: Excellent flavor, shelf extension, traditional methods needing minimal power.
Cons: Curing requires careful salt and nitrate handling; improper curing can be dangerous; smokehouses need proper ventilation and control.
Safety tips
- Follow tested recipes and cure times; nitrates are used for safety in some products (e.g., cured sausages).
- Ensure adequate salting and drying. For hot smoking as a preservation method, ensure an internal temperature rise sufficient to kill pathogens.
Sugaring, Jams, and Preserves
High sugar environments preserve fruit by tying up water and preventing microbial growth.
What it’s best for
Fruits that make good jams, jellies, marmalades, and candied fruits.
Typical shelf life
Canned jams and jellies can last 1–3 years; sugar preserves and candied fruits vary but can be stored long‑term if dry and sealed.
Basic approach
Cook fruit with sugar and possibly pectin to set. Can in jars using water bath processing. For candied fruit, boil in sugar syrup then dry and store.
Pros and cons
Pros: Tastes good, simple to prepare, versatile.
Cons: High sugar content, not suitable for all diets, can be energy intensive to can.
Safety tips
- Use proper canning techniques if you intend to shelf‑store jams.
- Sterilize jars and follow tested recipes.
Vacuum Sealing and Oxygen Absorbers
Removing oxygen slows oxidation and growth of aerobic organisms.
What it’s best for
Dry goods: grains, flour, beans, powdered milk, dehydrated foods. Also useful to extend the shelf life of meats and cheeses short‑term when frozen or chilled.
Typical shelf life
With oxygen absorbers and airtight packaging, dry goods can last years (3–25 years depending on the item and packaging).
How to use
- Use Mylar bags or vacuum bags with oxygen absorbers for long storage.
- Seal with a heat sealer for Mylar or with a vacuum sealer for plastic.
- Store in a cool, dry place away from light.
Pros and cons
Pros: Dramatically extends shelf life of dry goods, lightweight storage, pest protection when combined with mylar.
Cons: Doesn’t prevent moisture or temperature concerns; vacuum sealing of fresh foods without freezing can encourage anaerobic bacteria if not refrigerated.
Safety tips
- Do not vacuum seal fresh vegetables or meats unless frozen or following recommended preserving steps.
- Use the correct oxygen absorber size for the container volume.
Coolers, Iceboxes, and Evaporative Cooling (Zeer Pots)
If you can access water and have dry heat, evaporative cooling can lower temperatures substantially. Clay pot coolers (zeer pots) are simple and effective.
What they do
Evaporative cooling uses water evaporation to remove heat; clay pots with sand between two pots lose heat as water evaporates.
Best uses
Short‑term cooling of vegetables, fruits, and dairy in dry climates. Also keeps eggs and root vegetables longer than ambient in arid areas.
How to make a basic zeer pot
- Place wet sand between two unglazed clay pots with lids.
- Keep the sand moist and the unit in a shaded, ventilated spot.
- Replace water frequently; airflow maximizes cooling.
Pros and cons
Pros: Low cost, simple, no power required, effective in dry climates.
Cons: Less effective in high humidity, needs regular water refilling and monitoring.
Safety tips
- Keep food wrapped and off the wet sand directly.
- Monitor for pests and mold; clean pots regularly.
Root Cellaring and Cool Storage
Root cellars provide a stable, cool, humid environment for many crops. They work well for long‑term storage for crops harvested in fall.
Design basics
Locate below frost line or partially subterranean, include ventilation (inlet and outlet), insulation, shelves, and humidity control options. Aim for temperatures near 32–40°F for many root vegetables and 50–60°F for onions and squash—specific ranges vary by item.
Foods best for root cellaring
Potatoes, carrots, beets, turnips, cabbage, apples, and squash. Onions and garlic like drier storage.
Pros and cons
Pros: Low energy, long shelf life for proper crops, preserves texture.
Cons: Requires construction or a suitable native space, pest control important, limited to certain crops.
Safety tips
- Cure items like onions and garlic before storing to extend life.
- Check periodically and remove any spoiled items to prevent spread.
Comparative Table: Canning vs Dehydrating vs Freezing (Off‑Grid Freezing Alternatives)
This table helps you compare broad categories so you can pick what suits your situation.
| Method | Best for | Typical shelf life | Energy & equipment needs | Pros | Cons | Safety concerns |
|---|---|---|---|---|---|---|
| Canning (water bath & pressure) | Vegetables, meats (pressure), fruits, sauces | 1–5 years | Moderate to high energy; canner, jars | Long life, tasty, ready to eat | Heavy, requires exact processing | Botulism risk if processed incorrectly |
| Dehydrating | Fruits, herbs, vegetables, jerky | 6 months to several years | Low to moderate (solar or small heater) | Lightweight, compact, versatile | Texture changes, rehydration needed | Underdrying (jerky) risks microbial survival |
| Freezing alternatives (root cellar, icehouse) | Root crops, apples, some dairy/meat short‑term | Weeks to months (longer for root cellar) | Low once built; labor to harvest ice | Maintains texture for many produce | Climate dependent, construction | Thawing/refreezing if ice runs out increases spoilage |
")
Choosing the Right Method for Different Foods
Your pick depends on the food type, desired shelf life, available energy, and taste preferences.
Quick guidance
- For fruits you want as snacks or baking ingredients: dehydrate or can.
- For vegetables you want to use in cooked meals: can or ferment, or store in a root cellar.
- For meats: pressure can, cure and smoke, or keep iced/ frozen via icehouse.
- For long‑term dry staples: vacuum seal with oxygen absorbers.
Combining Methods Strategically
You can combine methods for maximum flexibility. For example:
- Dehydrate fruits then store in mylar with oxygen absorbers.
- Can tomato sauce and dehydrate herbs to keep your pantry varied.
- Ferment cabbage into sauerkraut, then store in a cool cellar or can it for shelf stability.
- Cure and smoke meat for flavor, then vacuum seal for shorter refrigerated life or store in a cool root cellar.
Combining methods preserves texture, flavor, and nutrient variety while hedging against method failures.
Storing Dry Goods (Grains, Beans, Flour)
Dry staples are the backbone of off‑grid food planning. Keep them dry, pest‑free, and cool.
Best practices
- Store in airtight containers (food‑grade buckets with gamma lids, mylar bags).
- Use oxygen absorbers for long storage.
- Keep flour and cracked grains in cool conditions or consider freezing briefly to kill insect eggs if you have power before storing (or use diatomaceous earth as a pest deterrent).
- Rotate stock with FIFO, and label with dates.
Pest Control and Storage Integrity
Rodents, insects, and mold are your biggest non‑microbial enemies. Use physical barriers, traps, sealed containers, and cleanliness.
Tips
- Keep food off the floor on pallets or shelves.
- Use metal bins for rodent‑proof storage.
- Freeze for 72 hours any flour or whole grain (if you can) to kill pests before long storage, or buy in small, used amounts.
- Monitor often and remove compromised items immediately.
Labeling, Rotation, and Organization
Label jars and containers with contents and date. Use FIFO (first in, first out) to avoid long‑term hoarding of older items. Create storage zones for canned goods, dehydrated items, dry staples, and cool storage.
Troubleshooting and Safety: What to Watch For
You need to know when to throw food away. Signs of spoilage vary by method.
Canned goods
- Bulging lids, leaking, spurting liquid when opened: discard.
- Off odors or unusual colors: discard.
- Mold inside: discard.
Ferments
- Mold (fuzzy, distinctly colored) on top: examine—some surface yeasts are harmless but colored mold or soft slimy textures usually mean discard.
- Strong rotten smells (not tangy): discard.
Dehydrated items
- Soft spots, sticky areas, or new mold: likely moisture reintroduction—discard or dry again if safe and no mold.
- Off smells: discard.
General
- Any sign of insect infestation: clean and freeze or thoroughly inspect; discard heavily infested items.
- If you suspect botulism (neurological symptoms after consuming canned products), seek immediate medical help.
Tools and Simple DIY Builds for Off‑Grid Preservation
You don’t need industrial gear to preserve food effectively. Some simple builds:
- Solar dehydrator: box with a glass or clear top, black trays, vents for airflow—low tech and effective.
- Root cellar: insulated below‑grade space or earth berm against a wall, with ventilation tubes.
- Zeer pot: double clay pots with sand and water improvised refrigerator for dry heat environments.
- Smokehouse: simple frame with a fire box and chimney for cold smoking and drying meats.
- Ice storage pit: insulated pit with drainage, covered and surrounded by straw for insulation—used historically for icehouses where climate allows.
Planning Your Off‑Grid Pantry
Make lists and menus for 1 week, 1 month, and long‑term. Think in terms of meals, not just ingredients.
Considerations
- Calorie density: grains, legumes, nuts, and fats are essential.
- Variety: preserved fruits, fermented vegetables, dried herbs for flavor.
- Nutrients: keep sources of vitamin C (pickles, sauerkraut, stored apples) and protein (canned or cured meats, beans).
- Tools and fuel: plan your fuel needs for canning or smoking seasons.
Rehydration and Cooking from Preserved Foods
Dehydrated foods often need soaking or boiling. Canned foods are generally ready to eat. Fermented and pickled items are often used straight from the jar. Plan recipes and rehydration ratios ahead for efficient cooking.
Final Recommendations: A Practical Off‑Grid Starter Plan
- Start with a small set of methods: canning basics for tomatoes and fruit; a solar dehydrator for fruit slices and herbs; and a small root cellar or cool storage for root crops.
- Build your skillset: practice water bath canning, then learn pressure canning for meats and vegetables.
- Create a dry goods kit: mylar bags, oxygen absorbers, a vacuum sealer if feasible.
- Make backups: ferment small batches for variety and nutrition.
- Monitor and adapt: check stored items monthly, rotate, and record what works best in your climate.
Conclusion
You have many options to store food off‑grid without a fridge. By understanding basic preservation principles and selecting methods that match your foods, climate, and resources, you can build a reliable, varied food supply. Start small, follow tested safety guidelines, and expand your toolkit—over time you’ll figure out what combination of canning, drying, curing, fermenting, and cool storage fits your life and tastes.